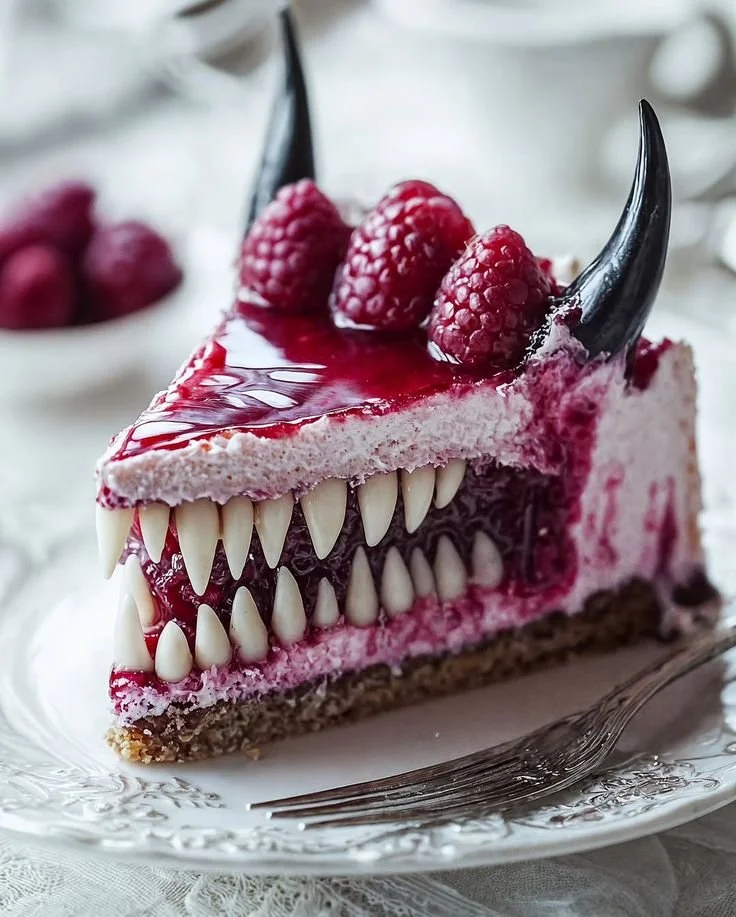
Halloween is a time for spooky fun, and what better way to celebrate than with a Horror Cake? This deliciously eerie dessert is perfect for gatherings, parties, or just a festive treat at home. With its dark chocolate flavor and creative decorations, this cake is sure to impress your guests and satisfy your sweet tooth.
Why You’ll Love Horror Cake
- Spooky Aesthetic: The cake’s dark colors and dramatic toppings make it visually striking, setting the perfect Halloween mood.
- Rich Flavor: The combination of cocoa powder and buttercream frosting creates a decadent flavor that chocolate lovers will adore.
- Easy to Make: With straightforward steps, this recipe is beginner-friendly, allowing even novice bakers to create a stunning cake.
- Customizable Decorations: Use colored frosting to unleash your creativity, making each cake unique in design.
- Great for Sharing: This cake serves a crowd, making it ideal for parties, potlucks, or any festive gathering where you want to delight a group.
Recipe Overview
- Prep Time: 20 minutes
- Cook Time: 30-35 minutes
- Total Time: 55-65 minutes
- Servings: 12
- Difficulty Level: Easy
Ingredients You’ll Need for Horror Cake
-
Dry Ingredients:
- 1 3/4 cups all-purpose flour
- 1 1/2 cups granulated sugar
- 1/2 cup unsweetened cocoa powder
- 1 1/2 teaspoons baking powder
- 1 teaspoon baking soda
- 1/2 teaspoon salt
-
Wet Ingredients:
- 2 large eggs
- 1 cup milk (whole or 2%)
- 1/2 cup vegetable oil
- 2 teaspoons vanilla extract
- 1 cup boiling water
-
Food Coloring & Decorations:
- Black food coloring
- Red food coloring
- Buttercream frosting (colored for decoration)

How to Make Horror Cake
-
Preheat Your Oven
Preheat the oven to 350°F (175°C) and grease two 9-inch round cake pans with oil or butter. This helps the cakes release easily after baking. -
Mix Dry Ingredients
In a large mixing bowl, combine the flour, sugar, cocoa powder, baking powder, baking soda, and salt. Whisk until evenly blended for a consistent cake texture. -
Add Wet Ingredients
Add the eggs, milk, vegetable oil, and vanilla extract to the dry mix. Mix on medium speed until well combined, ensuring no lumps remain. -
Incorporate Boiling Water
Carefully stir in the boiling water until the batter is smooth. It will be thin, but this helps keep the cake moist. -
Bake the Cakes
Divide the batter evenly between the prepared cake pans. Bake for 30-35 minutes or until a toothpick inserted into the center comes out clean. Keep an eye on them towards the end of baking to prevent overcooking. -
Cool and Frost
Once baked, let the cakes cool in the pans for about 10 minutes, then transfer to wire racks to cool completely. Once cooled, frost with buttercream and use black and red food coloring to create spooky designs. -
Serve and Enjoy
Slice the cake and serve at your Halloween party. Enjoy the compliments and the delightful taste!
Tips for Success
- Use Quality Cocoa Powder: Investing in good-quality unsweetened cocoa powder will enhance the chocolate flavor of the cake.
- Measure Ingredients Accurately: For optimal results, use a kitchen scale for dry ingredients or scoop and level your measuring cups to avoid a dense texture.
- Don’t Overmix: Once you add the wet ingredients, mix only until combined to keep the cake light and fluffy.
- Check for Doneness: Oven temperatures may vary. Use a toothpick or cake tester to check if the cake is done in the center.
- Cool Completely: Make sure the cakes are completely cool before frosting. This prevents the frosting from melting and sliding off.
Easy Variations
- Add Spices: Mix in a teaspoon of cinnamon or a pinch of cayenne pepper for a subtle warmth and depth of flavor.
- Chocolate Chips: Fold in 1 cup of semi-sweet or dark chocolate chips into the batter for added texture and richness.
- Gluten-Free Option: Substitute all-purpose flour with a gluten-free flour blend for gluten-sensitive friends and family.
- Layered Cake: Create a multi-layered cake by baking in three pans and adding frosting between each layer for a more dramatic look.
- Creepy Toppings: For a fun twist, add gummy worms or edible insects on top for a horror-themed party treat.
What to Serve with Horror Cake Slice
- Vanilla Ice Cream: The creamy vanilla offsets the rich chocolate, creating a delightful contrast in flavors.
- Spiced Hot Cocoa: A warm drink perfectly complements the horror cake’s richness, making for a cozy dessert pairing.
- Halloween-Themed Cookies: Serve alongside decorated sugar cookies to create a festive dessert platter.
- Whipped Cream: A dollop of fresh whipped cream adds lightness and balances the cake’s density.
- Fruit Salad: The freshness from a fruit salad can offer a nice palate cleanser after the sweetness of the cake.
Storage and Reheating
- Refrigerator Storage: Wrap the cake tightly in plastic wrap and store in the refrigerator for up to 5 days.
- Freezer Storage: If you want to freeze it, slice the cake and wrap each piece individually before placing them in an airtight container. It can last up to 3 months.
- Reheating Method: To enjoy chilled cake, simply let it sit at room temperature for about 20 minutes before serving. If reheating, place a slice in the microwave for about 10-15 seconds.
- Preserve Texture: To maintain moisture, place a piece of bread in the container with the cake. This keeps it fresh longer.
Common Mistakes to Avoid
- Underbaking: Make sure to test for doneness, as underbaked cakes can collapse or be too gooey.
- Skipping the Grease: Neglecting to grease your pans can result in a cake that sticks and breaks when cooling.
- Overfrosting: While it’s tempting to pile on the frosting, too much can overwhelm the cake’s chocolate flavor and make it too sweet.
- Not Letting it Cool: Frosting warm cake leads to melting frosting and a messy presentation.
- Ignoring Ingredient Temperature: For best mixing results, let eggs and milk come to room temperature before combining them with dry ingredients.
Horror Cake: Background & Cultural Inspiration
Horror Cake draws from the tradition of thematic desserts popular during Halloween, where creativity meets culinary delight. Originating from celebrations like the Day of the Dead and Samhain, these festive desserts often incorporate rich flavors and bright colors to symbolize the season’s changing nature. The blending of dark cocoa and vibrant food coloring represents the fun duality of Halloween—spookiness paired with sweet indulgence. This cake invites everyone to embrace the whimsical side of fear, making it a playful centerpiece to any celebration.
Frequently Asked Questions
Can I make this cake ahead of time?
Yes! You can bake the cake a day in advance. Just store it properly and frost it on the day you plan to serve.
What can I substitute for the vegetable oil?
You can use melted coconut oil, unsalted butter, or even applesauce for a lighter option.
Can I use another type of flour?
Yes, you can use whole wheat flour or gluten-free flour, but be mindful that it may alter the texture slightly.
How can I make the black frosting?
To make black frosting, start with chocolate buttercream, then gradually add black food coloring until you reach your desired shade.
How long does leftover cake last?
When properly wrapped and stored in the refrigerator, Horror Cake can last for up to 5 days.
Final Thoughts
Making a Horror Cake is not just about baking; it’s about creating a memorable experience. The combination of rich chocolate flavor and creative decorations makes it a wonderful treat for Halloween gatherings. Whether you’re a novice baker or a seasoned pro, this recipe is accessible and fun to personalize. Dive into the festivities, enjoy the delicious results, and delight your friends and family with this spectacular dessert. Happy baking!