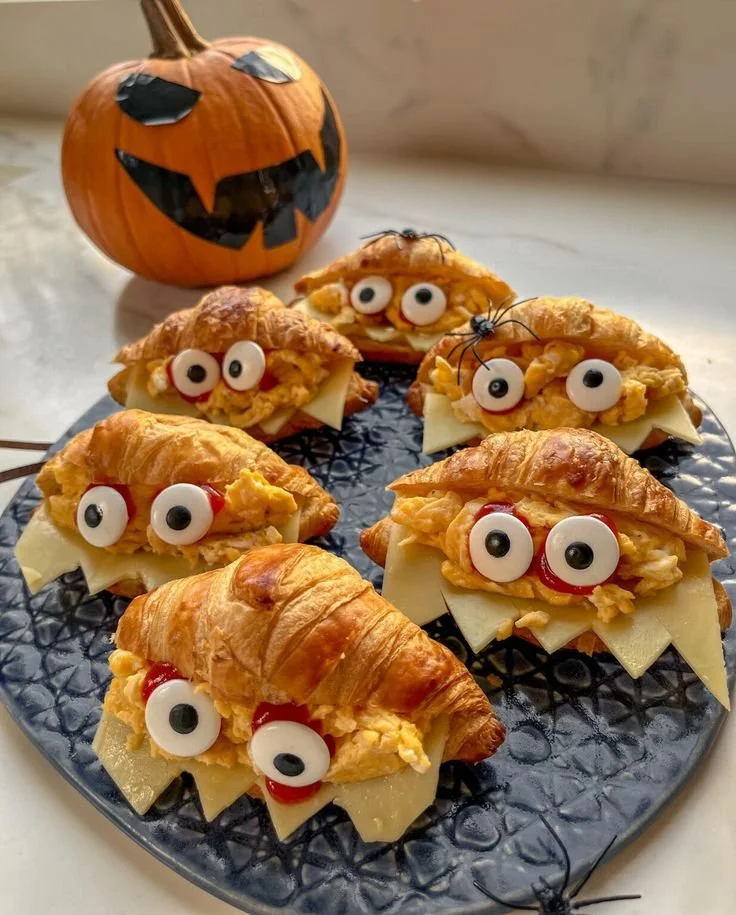
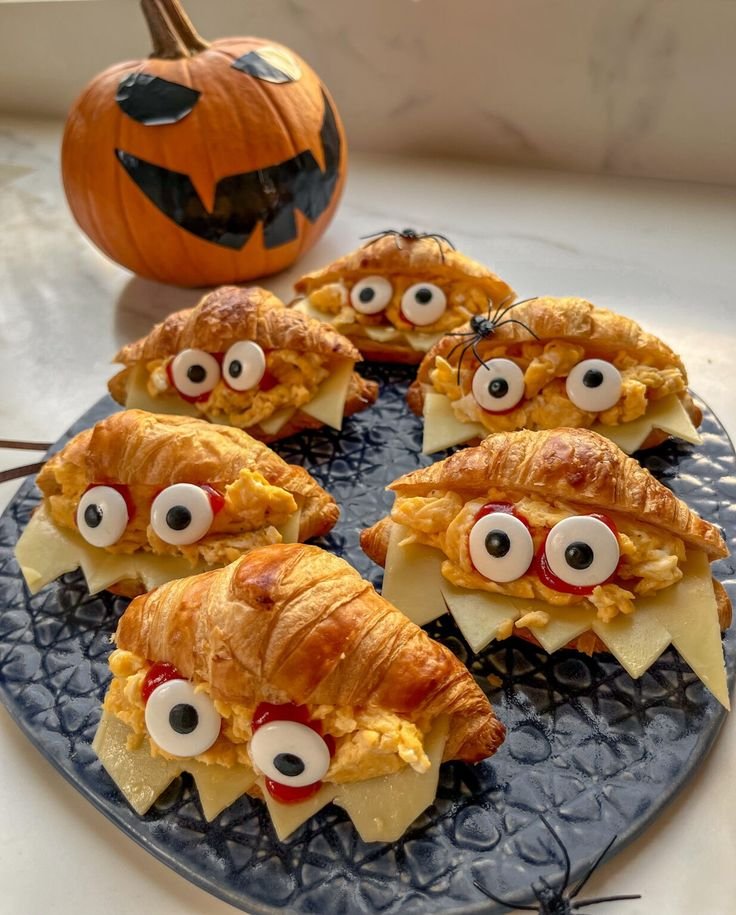
To celebrate Halloween, consider making Halloween Monster Sandwiches. This fun and whimsical dish is perfect for kids and adults alike, making it an excellent addition to any Halloween gathering. With its colorful ingredients and easy assembly, this recipe will bring smiles to faces while offering a delicious snack option.
Why You’ll Love Halloween Monster Sandwiches
- Creative Presentation: These sandwiches are not just tasty; they also look adorable with their monster eyes and colorful fillings, making them a great conversation starter at any Halloween party.
- Kid-Friendly Fun: Involving kids in decorating these sandwiches can make for a delightful family activity, ensuring that everyone plays a part in the fun of Halloween.
- Customizable Ingredients: You can adapt the fillings to suit various tastes, allowing you to cater to picky eaters or allergy considerations.
- Quick and Easy: With minimal cooking required, these sandwiches come together in no time, making them an excellent choice for last-minute plans.
- Perfect for Meal Prep: Assemble the components ahead of time, and then allow everyone to create their own sandwiches at the party, minimizing stress on the day of the event.
Recipe Overview
- Prep Time: 15 minutes
- Cook Time: 0 minutes
- Total Time: 15 minutes
- Servings: 8 sandwiches
- Difficulty Level: Easy
Ingredients You’ll Need for Halloween Monster Sandwiches
- Bread: 8 slices of your choice (white, whole grain, or gluten-free)
- Cream Cheese: 8 ounces, softened (acts as a spread and holds together the fillings)
- Vegetables:
- 1 cucumber, thinly sliced
- 1 red bell pepper, sliced into strips
- 1 carrot, shredded
- Decorative Items:
- 16 olives, halved (for eyes)
- 1 pack of candy eyes (edible eyes for fun decoration)
- Meat or Protein (Optional):
- 8 slices of deli turkey or ham
- Slices of cheese (cheddar or mozzarella, depending on preference)
How to Make Halloween Monster Sandwiches
-
Prepare the Bread: Lay out your slices of bread on a clean cutting board. If desired, cut off the crusts for a nice presentation.
-
Spread the Cream Cheese: Evenly spread a generous layer of softened cream cheese on each slice of bread. This will help the fillings stick and add creaminess.
-
Add Fillings: On half of the slices, layer your preferred fillings. Use cucumber slices, shredded carrots, and bell pepper strips. For a protein boost, add turkey or ham and cheese.
-
Top with Another Slice: Place the other bread slices on top of your filled slices to create sandwiches.
-
Cut and Decorate: Cut the sandwiches into fun shapes using cookie cutters if desired. Each sandwich can then be decorated with two olive halves as eyes and candy eyes for extra fun. Use additional cream cheese to help them stick if needed.
-
Serve Creatively: Arrange the sandwiches on a platter, making them the star of your Halloween spread.
Tips for Success
- Fresh Bread: Use fresh bread to ensure the best flavor and texture.
- Softened Cream Cheese: Make sure your cream cheese is soft for easier spreading.
- Presentation: Play around with different shapes and designs to make the sandwiches more visually appealing.
- Theme Your Fillings: Consider using color themes, like green vegetables for a “Frankenstein” effect or red for “vampire” sandwiches.
Easy Variations
- Vegetarian Option: Substitute turkey or ham with hummus or roasted vegetables to create vegetarian sandwiches.
- Dairy-Free: Use avocado instead of cream cheese for a dairy-free alternative, pairing it with your favorite vegan proteins.
- Spooky Shapes: Use Halloween-themed cookie cutters to create ghost, bat, or pumpkin-shaped sandwiches.
- Savory Swaps: Try using pesto or sun-dried tomato spread instead of cream cheese for a flavor twist.
What to Serve with Halloween Monster Sandwiches
- Veggie Platter: Pair these sandwiches with a colorful array of vegetables and dips for a crunchy, healthy contrast.
- Fruit Skewers: Fun, fruity kabobs can add a sweet touch to your table and balance the savory flavors.
- Pumpkin Soup: A warm bowl of pumpkin soup complements the sandwiches nicely and brings a comforting element to your spread.
- Themed Snacks: Consider adding spooky deviled eggs or vampire-inspired fruit cups to make your table festive.
Storage and Reheating
- Refrigerator Storage: Store assembled sandwiches in an airtight container in the fridge for up to 3 days. Keep the decorations separate if possible to maintain freshness.
- Freezer Storage: These sandwiches do not freeze well due to the cream cheese and fresh ingredients.
- Best Reheating Method: If preferred, you can lightly toast the assembled sandwich to warm it through but leave off eye decorations until serving.
- Meal Prep Note: You can prepare the components a day in advance but assemble them on the day of serving for the freshest taste.
Common Mistakes to Avoid
- Overstuffing: Don’t overload the fillings; this can make the sandwiches difficult to assemble and eat.
- Using Stale Bread: Always opt for fresh bread for the best flavor and texture.
- Ignoring Sponge Effect: Avoid letting the assembled sandwiches sit too long as the bread can become soggy.
Halloween Monster Sandwiches: Background & Cultural Inspiration
Halloween Monster Sandwiches draw inspiration from the playful and whimsical spirit of Halloween, a time when creativity and imagination are at their peak. While sandwiches have been a lunch staple for ages, adding a fun twist with decorations allows for celebration without complicated cooking. These sandwiches offer a lighthearted way to engage families in the festivities of the season while still enjoying healthy ingredients.
Frequently Asked Questions
Can I make these sandwiches ahead of time?
Yes, you can prepare the fillings and spread ahead of time, but it’s best to assemble the sandwiches the same day to keep the bread fresh.
What can I use instead of cream cheese?
You can substitute cream cheese with hummus, avocado, or any spreadable cheese depending on your dietary preferences.
Are these sandwiches suitable for a gluten-free diet?
Absolutely! You can use gluten-free bread and still enjoy all the fun without compromise.
What if my kids dislike some of the ingredients?
Feel free to customize the fillings based on your children’s preferences. These sandwiches are adaptable to any flavor combinatio!
How can I store leftovers?
Store any leftover sandwiches in an airtight container in the refrigerator and consume them within three days for the best taste.
Final Thoughts
Halloween Monster Sandwiches are not only a playful addition to your Halloween celebration but also a delicious and healthy option for all ages. Their ease of preparation and customizable nature make them perfect for involving the whole family. Give this recipe a try at your next gathering; it’s sure to be a hit among guests and ghouls alike!
PrintHalloween Monster Sandwiches
Fun and whimsical Halloween Monster Sandwiches perfect for kids and adults, featuring colorful fillings and playful decorations.
- Prep Time: 15 minutes
- Cook Time: 0 minutes
- Total Time: 15 minutes
- Yield: 8 sandwiches
- Category: Snack
- Method: Assembly
- Cuisine: American
- Diet: Vegetarian
Ingredients
- 8 slices of bread (white, whole grain, or gluten-free)
- 8 ounces cream cheese, softened
- 1 cucumber, thinly sliced
- 1 red bell pepper, sliced into strips
- 1 carrot, shredded
- 16 olives, halved (for eyes)
- 1 pack of candy eyes (edible decoration)
- 8 slices of deli turkey or ham (optional)
- Slices of cheese (cheddar or mozzarella, optional)
Instructions
- Prepare the Bread: Lay out your slices of bread on a clean cutting board.
- Spread the Cream Cheese: Evenly spread a generous layer of cream cheese on each slice of bread.
- Add Fillings: On half of the slices, layer your preferred fillings.
- Top with Another Slice: Place the other bread slices on top to create sandwiches.
- Cut and Decorate: Cut the sandwiches into fun shapes and decorate with olives and candy eyes.
- Serve Creatively: Arrange the sandwiches on a platter for serving.
Notes
Use fresh bread and softened cream cheese for best results. Consider different fillings and shapes for a creative presentation.