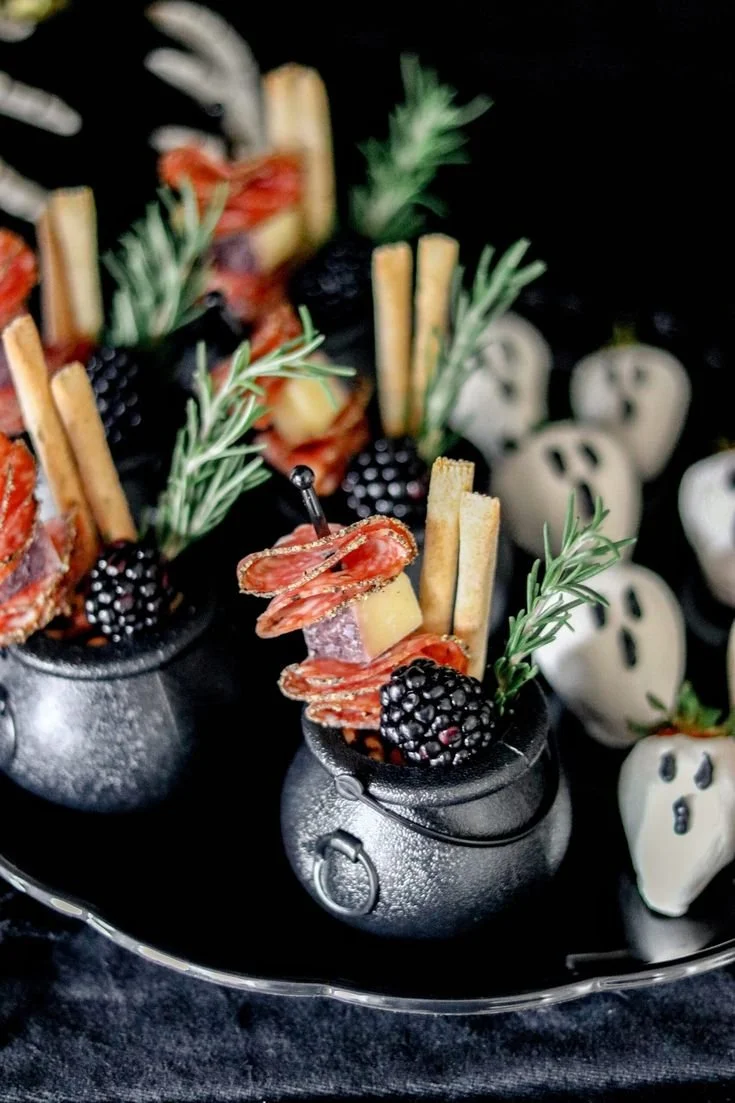
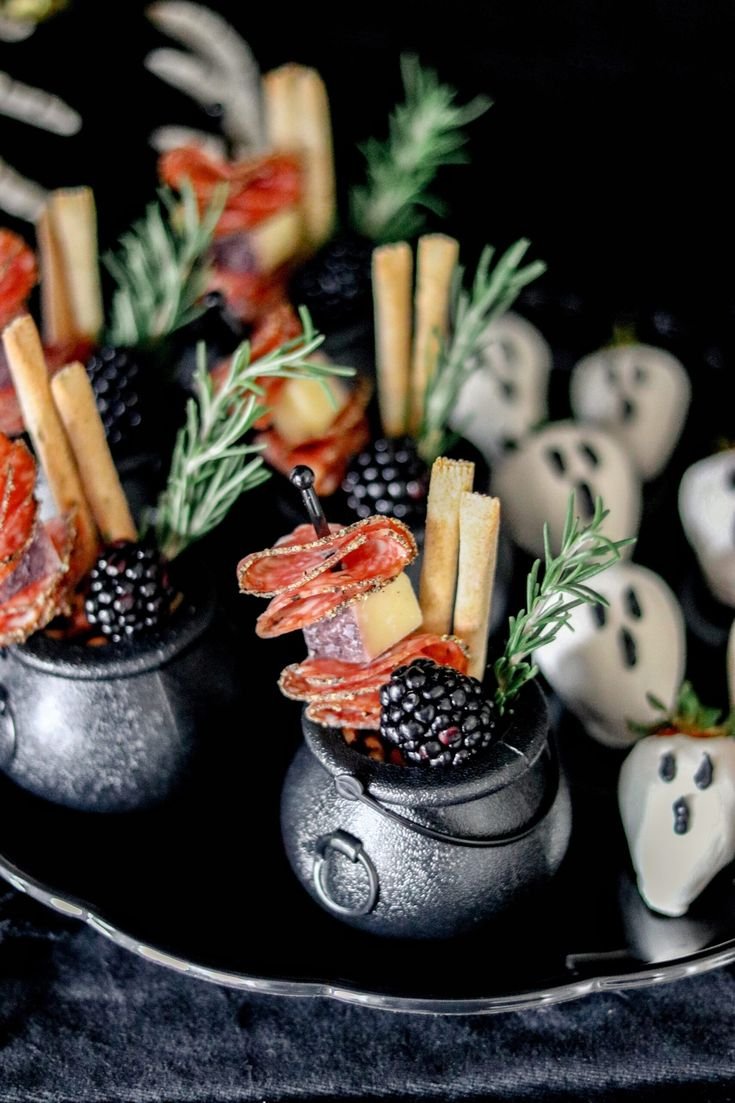
Creating festive Mini Charcuterie Cauldrons for Halloween is a delightful way to celebrate the spooky season while indulging in tasty bites. These individually portioned snacks are perfect for parties, gatherings, or a cozy night in. Not only are they simple to assemble, but they also provide a great opportunity to showcase a variety of flavors and textures that everyone will love.
Why You’ll Love Mini Charcuterie Cauldrons
- Quick Assembly: With no cooking required, these cauldrons come together in minutes, making them an effortless addition to your Halloween spread.
- Personalized Portions: Each mini cauldron is a self-contained unit filled with favorite snacks, allowing everyone to customize their picks for a more enjoyable experience.
- Variety of Flavors: Featuring an assortment of cured meats, cheeses, and accompaniments, these cauldrons offer a delightful mix that appeals to different tastes.
- Festive Presentation: The whimsical appearance of these mini charcuterie cauldrons adds a fun and festive touch to your Halloween table.
- Perfect for Any Occasion: Whether for Halloween, parties, or just a casual gathering, these delightful snacks fit right in.
Recipe Overview
- Prep Time: 15 minutes
- Cook Time: 0 minutes
- Total Time: 15 minutes
- Servings: 8 individual cauldrons
- Difficulty Level: Easy
Ingredients You’ll Need for Mini Charcuterie Cauldrons
- Cured Meats:
- Salami (adds flavor)
- Prosciutto (for a delicate, salty touch)
- Cheese Cubes:
- Cheddar (sharp and tangy)
- Gouda (creamy and mild)
- Accompaniments:
- Olives (briny flavor)
- Grapes (fresh sweetness)
- Mini pickles (crunchy and tangy)
- Crackers: Your choice for a crunchy element
- Hummus or Dip: A small dollop for added flavor
How to Make Mini Charcuterie Cauldrons
- Gather Ingredients: Collect all your cured meats, cheese cubes, olives, grapes, mini pickles, crackers, and hummus.
- Line with Cured Meats: Arrange a layer of cured meats at the bottom of each mini cauldron. This forms a flavorful base.
- Add Cheese: Place the cheese cubes next to the meats, mixing colors and textures for visual appeal.
- Fill with Accompaniments: Fill the empty spaces with olives, grapes, and mini pickles, creating a vibrant display.
- Add Crackers: Arrange a few crackers around the edges of the cauldron for a crunchy addition.
- Include a Dip: Top with a dollop of hummus or your chosen dip in the center for added flavor and moisture.
- Serve Immediately: Enjoy your festive Mini Charcuterie Cauldrons right away for the best texture and flavor.
Tips for Success
- Use Fresh Ingredients: Choose fresh, flavorful ingredients for the best outcome. This makes a significant difference in taste.
- Balance Flavors: Mix savory, sweet, and tangy items for a well-rounded experience.
- Pay Attention to Presentation: Neatly arrange items in the cauldrons for a visually appealing display that invites guests to dig in.
- Avoid Soggy Crackers: Place crackers close to the edges and keep them separate from moist items to maintain crunchiness.
- Customize to Taste: Feel free to swap out ingredients based on preferences or dietary needs for your guests.
Easy Variations
- Meat Swaps: Substitute cured meats with smoked turkey or chicken for a lighter option.
- Cheese Choices: Experiment with pepper jack for a spicy kick or goat cheese for a creamy alternative.
- Plant-Based Options: Use hummus as a dip and fill with vegetables like carrot sticks and bell pepper strips for a vegetarian version.
- Extra Crunch: Add nuts or seeds for additional crunch and protein.
- Themed Dips: Try seasonal dips, like pumpkin or beet hummus, to keep it festive.
What to Serve with Mini Charcuterie Cauldrons
- Wine: A light white wine or a sparkling fruit beverage pairs nicely with the flavors of the charcuterie.
- Pita Chips: These offer a crunchy alternative for dipping that complements the cauldron flavors.
- Vegetable Platter: Fresh veggies provide a healthy contrast and an additional crunch that balances the richness of the meats and cheeses.
- Spooky Halloween Treats: Serve alongside Halloween-themed sweets for a fun contrast.
- Seasonal Fruits: Apples or pears can provide a refreshing side that pairs well with the meats.
Storage and Reheating
- Refrigerator Storage: Store any leftovers in an airtight container. They are best enjoyed within 24 hours for freshness.
- Freezer Storage: Freezing is not recommended for assembled mini cauldrons, as the texture of fresh ingredients will suffer.
- Best Eating Method: Consume your cauldrons as soon as possible to maintain the best quality and flavors.
- Meal Prep Note: If preparing in advance, keep ingredients separate and assemble shortly before serving.
Common Mistakes to Avoid
- Overloading Cauldrons: Adding too many ingredients can lead to a messy presentation and overwhelming flavors.
- Using Stale Ingredients: Check for freshness to ensure your cauldrons taste great.
- Neglecting Color and Variety: Aim for a colorful spread to make your cauldrons visually appealing and enticing.
- Not Using Enough Space: Keep items spaced properly in each cauldron for easy access and a delightful munching experience.
Mini Charcuterie Cauldrons: Background & Cultural Inspiration
Charcuterie boards have long been a part of many cultures, emphasizing the beauty of communal dining and shared experiences. The tradition comes from France, where the word “charcuterie” refers to a specific preparation of cured meats. Over the years, this culinary art has evolved into a beloved practice, featuring various items that accommodate different preferences. Miniature versions, like these cauldrons, allow for creativity and personalization, especially during festive seasons like Halloween, encouraging everyone to enjoy their snacks in style.
Frequently Asked Questions
Can I prepare mini charcuterie cauldrons ahead of time?
Yes, you can prepare the individual ingredients in advance but assemble them right before serving for the best quality.
What can I use instead of hummus for dips?
You could use guacamole, spinach dip, or a yogurt-based dip as alternatives.
How long can I store the leftovers?
It’s best to consume the leftovers within 24 hours for optimal freshness.
Can I swap the cheese for dairy-free options?
Absolutely! Plant-based cheese alternatives work well in this recipe.
What if I don’t have mini cauldrons?
You can use small jars, cups, or even muffin tins to create individual servings.
Final Thoughts
Mini Charcuterie Cauldrons bring a playful and delicious twist to your Halloween celebrations. Easy to assemble and filled with a variety of flavors, they are sure to delight guests and family alike. Try this fun recipe for your next gathering, and experience the joy of sharing delightful morsels that everyone will enjoy.
PrintMini Charcuterie Cauldrons

Delightful individually portioned snacks perfect for Halloween gatherings, filled with an assortment of cured meats, cheeses, and fun accompaniments.
- Prep Time: 15 minutes
- Cook Time: 0 minutes
- Total Time: 15 minutes
- Yield: 8 servings
- Category: Appetizer
- Method: No Cooking Required
- Cuisine: French
- Diet: Vegetarian
Ingredients
- Salami
- Prosciutto
- Cheddar cheese
- Gouda cheese
- Olives
- Grapes
- Mini pickles
- Crackers of your choice
- Hummus or dip
Instructions
- Gather all your cured meats, cheese cubes, olives, grapes, mini pickles, crackers, and hummus.
- Line with cured meats at the bottom of each mini cauldron to form a flavorful base.
- Add cheese cubes next to the meats, mixing colors and textures for appeal.
- Fill the empty spaces with olives, grapes, and mini pickles.
- Add crackers around the edges of the cauldron.
- Include a dollop of hummus or your chosen dip in the center.
- Serve immediately for the best texture and flavor.
Notes
Use fresh ingredients for best results. Keep items neatly arranged to ensure visual appeal.