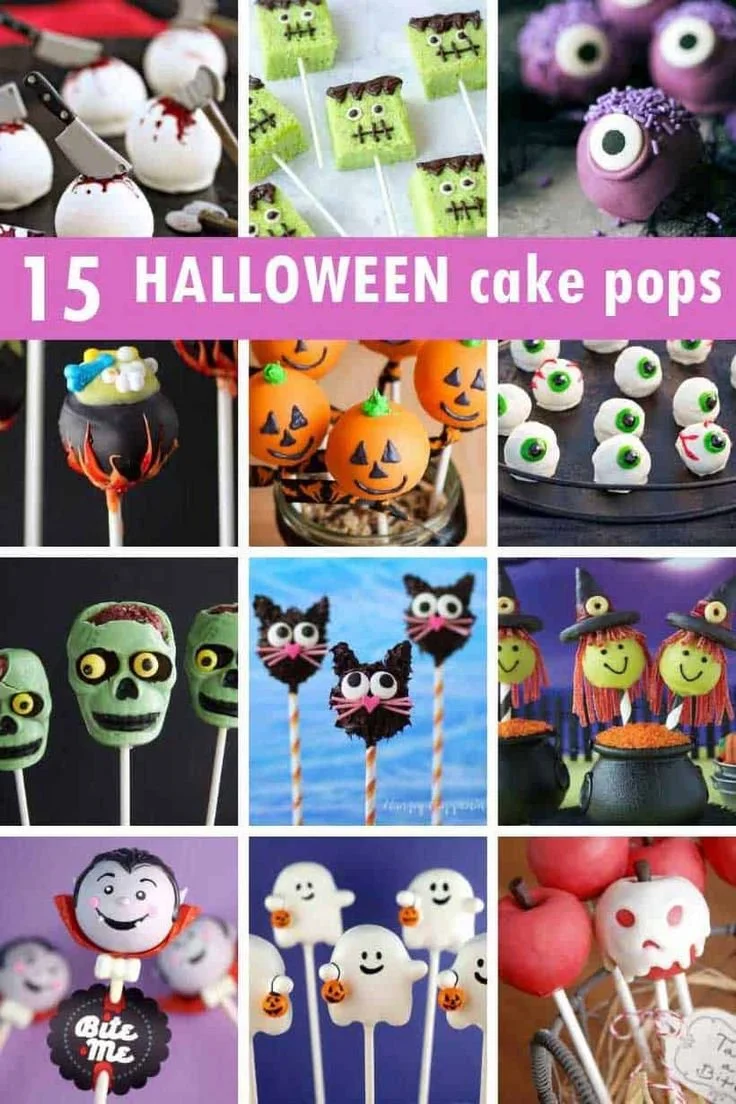
If you’re looking for a delightful way to celebrate Halloween, these Halloween Cake Pops are just the treat you need. Fun to make and even more fun to eat, these cake pops combine moist cake with creamy frosting, all coated in colorful candy melts. They’re perfect for parties, kids’ classrooms, or simply as a festive dessert at home.
Why You’ll Love Halloween Cake Pops
- Fun for Everyone: Whether you’re hosting a Halloween party or looking for something festive to make with the kids, these cake pops are a hit with all ages.
- Customizable Decorations: The candy coating and sprinkles allow for endless creativity. You can design them as ghosts, pumpkins, or any spooky creature you can imagine.
- Make Ahead: These cake pops can be prepared in advance, making them a convenient option for busy schedules. Just store them until you’re ready to serve!
- Easy to Handle: The lollipop stick makes these treats perfectly portable. They’re great for desserts on the go or for parties, with no mess involved.
- Deliciously Indulgent: With their rich cake and frosting center, they’re sure to satisfy your sweet tooth while offering a fun and playful presentation.
- Simple Steps: Even beginner bakers can successfully whip up these treats with just a few ingredients and simple instructions.
Recipe Overview
- Prep Time: 30 minutes
- Cook Time: 30 minutes (plus cooling)
- Total Time: 1 hour
- Servings: Approximately 24 cake pops
- Difficulty Level: Easy
Ingredients You’ll Need for Halloween Cake Pops
For the Cake
- 1 box of cake mix (any flavor): Choose a flavor you love; chocolate or vanilla works well.
For the Frosting
- 1 cup of frosting: Store-bought or homemade, vanilla frosting complements most cake flavors beautifully.
For the Candy Coating
- 12 oz of candy melts (any color): Orange, black, or purple are perfect for Halloween themes.
For Decorating
- Sprinkles or edible decorations: Use Halloween-themed sprinkles to add a festive touch.
- Lollipop sticks: These hold the cake pops and make them easy to eat.
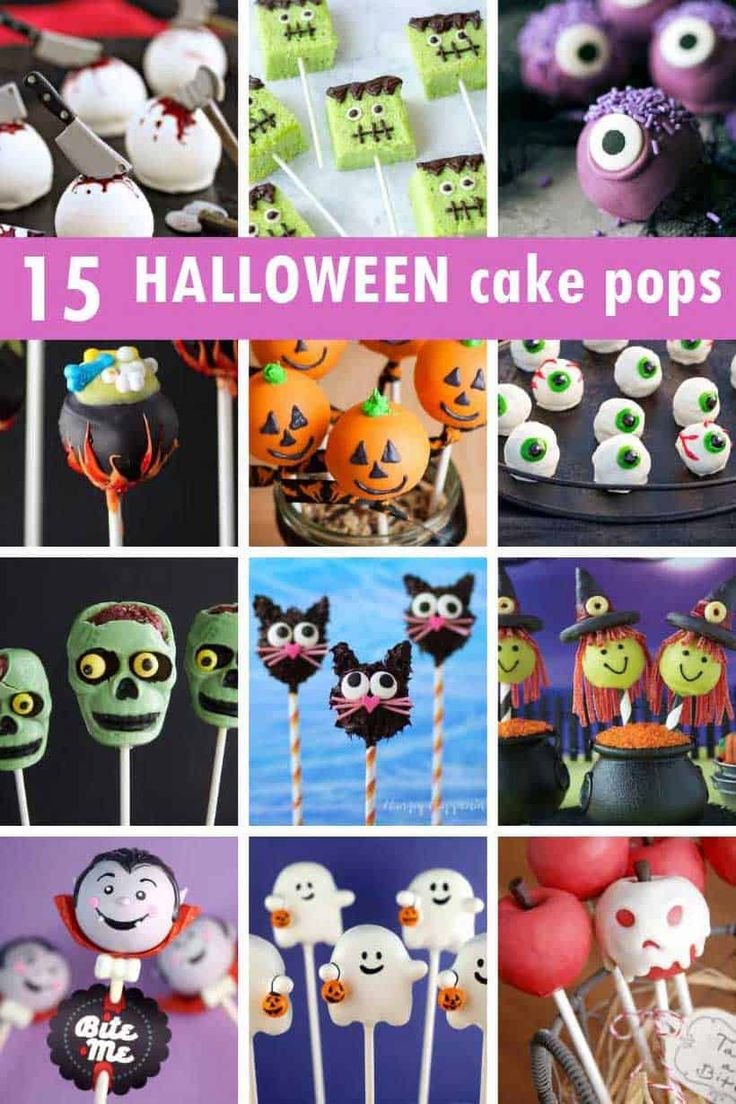
here
How to Make Halloween Cake Pops
1. Bake the Cake
Follow the instructions on the cake mix box to bake the cake. Once baked, let it cool completely on a wire rack.
2. Crumble the Cake
Once the cake has cooled, crumble it into a large bowl. Make sure there are no large chunks remaining for the best texture.
3. Mix in the Frosting
Add the frosting to the cake crumbs and mix until fully combined. The mixture should be moist but not too sticky.
4. Shape the Cake Balls
Take small portions of the mixture and roll them into balls, about 1 inch in diameter. Place them on a baking sheet lined with parchment paper.
5. Freeze the Cake Balls
Transfer the baking sheet to the freezer and let the cake balls freeze for about 30 minutes. This helps them hold their shape when dipped.
6. Melt the Candy Coating
Follow the package instructions to melt the candy coating. A microwave or double boiler can work well for this.
7. Prepare the Sticks
Once the candy coating is melted, dip the end of each lollipop stick into the coating before inserting it into the center of a cake ball. This helps secure the stick in place.
8. Dip the Cake Pops
Rotate each cake pop in the melted candy coating until fully covered. Allow any excess coating to drip off.
9. Decorate
While the coating is still wet, sprinkle with decorations. Get creative with designs—these are your spooky treats!
10. Set the Cake Pops
Place the finished cake pops upright in a cake pop stand or a styrofoam block to allow them to set completely.
Tips for Success
- Cool Completely: Ensure the cake is fully cooled before crumbling to prevent melting the frosting.
- Consistency is Key: Adjust the frosting amount for the perfect texture; too much can make the mixture too wet, while too little may not hold together.
- Use a Melting Pot: If you can, invest in a candy melting pot for even and controlled melting of candy melts.
- Avoid Over-Dipping: After dipping the cake pops, make sure to let them drip for a few seconds to prevent a thick coating from forming.
- Chill Between Steps: If the mixture becomes too warm while handling, return it to the freezer for a few minutes.
Easy Variations
- Flavored Cake Mix: Try using different cake mixes, like red velvet or funfetti, for a unique flavor and color.
- Chocolate Coating: Substitute candy melts with chocolate for a classic coating.
- Dairy-Free Option: Use a dairy-free cake mix and frosting for a vegetarian-friendly treat.
- Nut Allergies: Make sure to check your ingredients for allergens like nuts if serving to a mixed group.
- Boozy Cake Pops: Add a splash of flavored liqueur (like orange or chocolate) to the cake mixture for an adult twist.
What to Serve with Halloween Cake Pops
- Apple Cider: A warm cup complements the sweetness of the cake pops perfectly.
- Pumpkin Spice Cookies: These add to the seasonal flavor themes and are a hit at parties.
- Cheese Platter: Pairing with savory options balances the sweetness.
- Chocolate Dipped Pretzels: The salty crunch contrasts nicely with the sweetness of the cake pops.
Storage and Reheating
- Refrigerator Storage: Store the cake pops in an airtight container in the refrigerator for up to one week.
- Freezer Storage: You can freeze the cake pops for up to three months. Just ensure they’re fully set before freezing.
- Reheating: These treats are best enjoyed cold or at room temperature; avoid reheating as it can ruin the coating.
- Meal Prep Note: These are great for prepping ahead of a party; just allow them to thaw in the fridge before serving.
Common Mistakes to Avoid
- Not Cooling the Cake: Skipping the cooling step can lead to melting the frosting and a messy mixture.
- Overmixing: Be gentle when combining the frosting and cake; overmixing can make the texture too dense.
- Skipping the Freezing Step: Failing to freeze the cake balls can result in them falling apart during dipping.
- Neglecting to Decorate: Waiting too long to decorate after dipping can result in the coating setting before you’ve added any sprinkles.
Halloween Cake Pops: Background & Cultural Inspiration
Cake pops as we know them gained popularity in the early 2000s, but their roots trace back to older cake-making traditions. These bite-sized desserts cleverly use cake scraps and frosting, transforming leftovers into delightful treats. Halloween adds an extra layer of creativity, allowing bakers to explore spooky themes and festive colors, making them a fun activity for families and friends alike. The festive colors of orange and black, referencing classic Halloween motifs, make these cake pops a staple during the fall holiday season.
Frequently Asked Questions
Can I make these cake pops ahead of time?
Yes, you can prepare the cake pops a few days in advance and store them in the fridge or freezer until ready to serve.
What’s the best way to store leftover cake pops?
Keep them in an airtight container in the refrigerator to maintain their freshness for up to a week.
Are there any ingredient substitutions I can make?
Absolutely! You can use gluten-free cake mix and frosting or dairy-free options depending on dietary needs.
How can I make the cake pops less sweet?
Consider reducing the amount of frosting used or choose a less sweet candy coating.
Can I use chocolate instead of candy melts?
Yes, chocolate can be an excellent alternative, though you might need to add a bit of vegetable oil to achieve a smooth dipping consistency.
Final Thoughts
These Halloween Cake Pops are not just delightful to behold; they also provide a perfect canvas for your creativity during the spooky season. With simple ingredients and easy steps, you can create festive treats that everyone will love. Whether you serve them at a party or enjoy them with family, these cake pops promise delicious fun. Don’t hesitate to give them a try—your Halloween festivities will thank you!
PrintHalloween Cake Pops

Delightful Halloween Cake Pops made with moist cake, creamy frosting, and colorful candy melts. Perfect for parties and festive gatherings.
- Prep Time: 30 minutes
- Cook Time: 30 minutes
- Total Time: 60 minutes
- Yield: 24 servings
- Category: Dessert
- Method: Baking
- Cuisine: American
- Diet: Vegetarian
Ingredients
- 1 box of cake mix (any flavor)
- 1 cup of frosting (store-bought or homemade)
- 12 oz of candy melts (any color)
- Sprinkles or edible decorations
- Lollipop sticks
Instructions
- Bake the Cake: Follow the instructions on the cake mix box to bake the cake. Once baked, let it cool completely on a wire rack.
- Crumble the Cake: Once the cake has cooled, crumble it into a large bowl. Make sure there are no large chunks remaining for the best texture.
- Mix in the Frosting: Add the frosting to the cake crumbs and mix until fully combined. The mixture should be moist but not too sticky.
- Shape the Cake Balls: Take small portions of the mixture and roll them into balls, about 1 inch in diameter. Place them on a baking sheet lined with parchment paper.
- Freeze the Cake Balls: Transfer the baking sheet to the freezer and let the cake balls freeze for about 30 minutes.
- Melt the Candy Coating: Follow the package instructions to melt the candy coating.
- Prepare the Sticks: Once the candy coating is melted, dip the end of each lollipop stick into the coating before inserting it into the center of a cake ball.
- Dip the Cake Pops: Rotate each cake pop in the melted candy coating until fully covered. Allow any excess coating to drip off.
- Decorate: While the coating is still wet, sprinkle with decorations.
- Set the Cake Pops: Place the finished cake pops upright in a cake pop stand or a styrofoam block to allow them to set completely.
Notes
Make ahead for convenience and to save time on the day of your event.