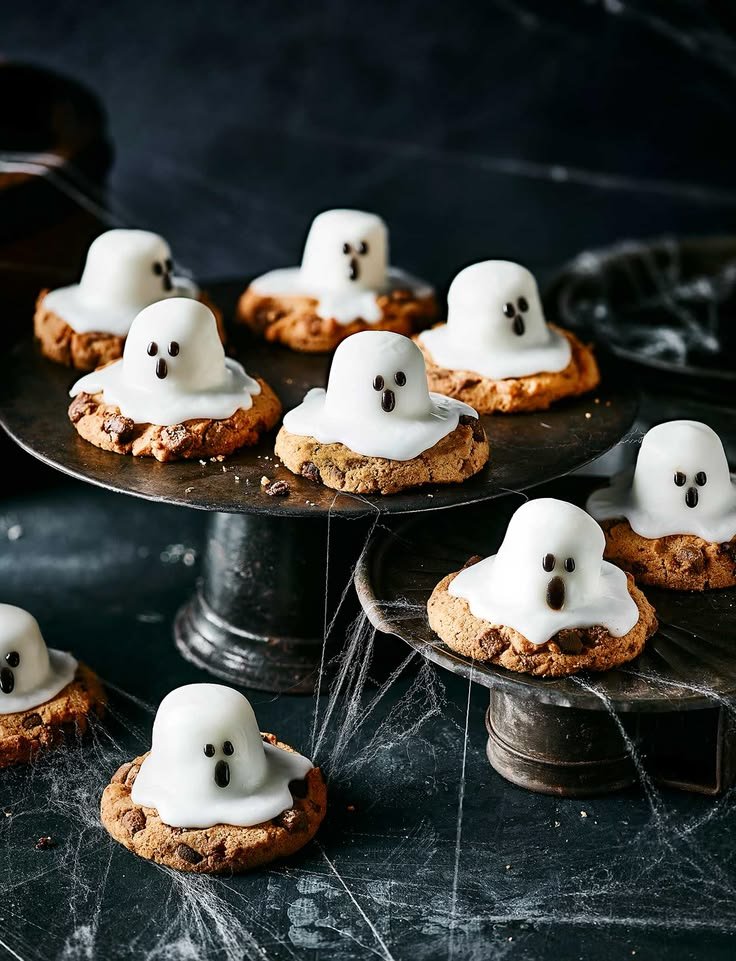
Making Ghost Cookies is a delightful way to embrace the Halloween spirit! These fun, easy-to-decorate treats feature a buttery cookie base that’s perfect for spooky celebrations. They’re simple enough for beginner bakers and offer a fantastic activity for kids while adding a delightful charm to your Halloween gatherings.
Why You’ll Love Ghost Cookies
- Fun for Everyone: These cookies double as an arts and crafts project. Kids and adults alike will enjoy decorating the ghostly faces with icing and chocolate chips.
- Easy to Make: The straightforward steps and common ingredients make these cookies accessible for even the newest bakers.
- Customizable: You can let your creativity shine through by altering the decorations, making each cookie unique!
- Perfect for Parties: These festive cookies are a great addition to any Halloween party or gathering, sure to be a hit with guests of all ages.
- Deliciously Buttery: The soft, tender texture of these cookies combined with their sweet flavor makes them a delightful treat.
Recipe Overview
- Prep Time: 15 minutes
- Cook Time: 12 minutes
- Total Time: 27 minutes
- Servings: About 24 cookies
- Difficulty Level: Easy
Ingredients You’ll Need for Ghost Cookies
-
Wet Ingredients:
- 1 cup unsalted butter, softened (adds richness)
- 1 cup granulated sugar (provides sweetness)
- 1 large egg (binds the ingredients)
- 1 teaspoon vanilla extract (enhances flavor)
-
Dry Ingredients:
- 2 1/2 cups all-purpose flour (forms the cookie base)
- 1 teaspoon baking powder (helps cookies rise)
- 1/2 teaspoon salt (balances sweetness)
-
Decoration:
- White icing (for the ghostly finish)
- Chocolate chips (for the eyes)
How to Make Ghost Cookies
- Preheat Your Oven: Set the oven to 350°F (175°C) to prepare for baking.
- Cream Butter and Sugar: In a mixing bowl, beat the softened butter and granulated sugar together until light and fluffy. This aerates the mixture for a great texture.
- Add Egg and Vanilla: Stir in the egg and vanilla extract until fully combined. The mixture should be smooth and creamy.
- Mix Dry Ingredients: In another bowl, whisk together the all-purpose flour, baking powder, and salt.
- Combine Dry and Wet Ingredients: Gradually add the dry mixture to the wet ingredients, mixing until a dough forms. Avoid overmixing to keep the cookies tender.
- Cut Out Ghost Shapes: Roll out the dough on a lightly floured surface and use a ghost-shaped cookie cutter to cut out your cookies.
- Prepare for Baking: Place the cookies on a baking sheet lined with parchment paper. Ensure they are spaced apart to allow for spreading.
- Bake Cookies: Bake in the preheated oven for 10-12 minutes or until the edges are lightly golden. They will firm up as they cool.
- Cool and Decorate: Allow the cookies to cool completely on a wire rack before decorating with white icing and adding chocolate chips for eyes.
Tips for Success
- Use butter at room temperature for easier creaming with sugar.
- Don’t overbake the cookies; remove them when the edges are golden for the best texture.
- If the dough is too sticky, refrigerate it for 30 minutes before rolling out.
- Feel free to experiment with different icing colors or edible decorations for a personalized touch.
Easy Variations
- Chocolate Ghost Cookies: Substitute 1/2 cup of flour for cocoa powder for a chocolatey twist.
- Spiced Ghost Cookies: Add a teaspoon of cinnamon or nutmeg for an aromatic flavor.
- Nutty Variation: Incorporate 1/2 cup of finely chopped nuts into the dough for added crunch.
- Dairy-Free Option: Replace butter with a dairy-free margarine and use an egg substitute like flaxseed meal.
What to Serve with Ghost Cookies
- Hot Chocolate: A warm cup of hot chocolate pairs perfectly with these sweet treats, creating a cozy experience.
- Halloween Punch: Serve with a spooky Halloween-themed punch for an added festive flair.
- Spooky Fruit Platter: Complement the cookies with a platter of fruits, like sliced oranges and berries, shaped like bats or spiders.
- Caramel Apples: The crunchy sweetness of caramel apples enhances the theme while providing a fruity option.
Storage and Reheating
- Refrigerator Storage: Store the cookies in an airtight container in the fridge for up to a week.
- Freezer Storage: You can freeze the unbaked dough. Wrap it tightly and store it for up to three months. Thaw in the fridge before rolling and baking.
- Best Reheating Method: To reheat, warm cookies in the oven at 300°F (150°C) for about 5-7 minutes to regain their soft texture.
- Meal Prep Note: Prepare the dough a few days in advance, so you can quickly bake and decorate cookies for unexpected guests.
Common Mistakes to Avoid
- Overmixing the Dough: This can lead to tough cookies. Mix just until ingredients are combined.
- Not Chilling the Dough: If the dough is too soft to cut shapes, chill it before rolling.
- Using Cold Butter: Cold butter doesn’t cream well and can affect the texture. Always use softened butter.
- Skipping the Cooling Step: Decorations can melt on warm cookies, so let them cool completely before icing.
Ghost Cookies: Background & Cultural Inspiration
Ghost cookies are a popular festive treat that harkens back to the tradition of Halloween baking. Originating in the United States, similar cookie-cutting rituals have been adopted worldwide, often associated with seasonal festivities. Making cookies in fun shapes is not only enjoyable but also a way to bond with family and friends during the Halloween season, embodying the spirit of togetherness and creativity.
Frequently Asked Questions
Can I make these cookies ahead of time?
Yes! You can prepare the dough in advance and store it in the fridge for a day or freeze it for longer storage.
How can I decorate these cookies differently?
You can use colored icing, sprinkle edible glitter, or even add fondant decorations for a variety of looks.
What if I don’t have a ghost-shaped cookie cutter?
Feel free to use any shape you like! Halloween-themed shapes, such as pumpkins or bats, would work just as well.
Can I change the flavor of these cookies?
Absolutely! You can add flavor extracts such as almond or peppermint for a unique twist.
What’s the best way to store leftover cookies?
Keep leftover cookies in an airtight container at room temperature for up to a week. For longer storage, you can freeze them.
Final Thoughts
Ghost Cookies are an enjoyable baking project that’s perfect for celebrating Halloween. With their simple preparation and fun decoration process, they become more than just treats; they’re a way to create memories with friends and family. Give this recipe a try, and you’ll have a spooky yet delicious addition to your Halloween festivities!
PrintGhost Cookies

Delightful buttery cookies decorated to celebrate the Halloween spirit.
- Prep Time: 15 minutes
- Cook Time: 12 minutes
- Total Time: 27 minutes
- Yield: 24 cookies
- Category: Dessert
- Method: Baking
- Cuisine: American
- Diet: Vegetarian
Ingredients
- 1 cup unsalted butter, softened
- 1 cup granulated sugar
- 1 large egg
- 1 teaspoon vanilla extract
- 2 1/2 cups all-purpose flour
- 1 teaspoon baking powder
- 1/2 teaspoon salt
- White icing
- Chocolate chips
Instructions
- Preheat your oven to 350°F (175°C).
- Cream butter and sugar together until light and fluffy.
- Add egg and vanilla, mixing until combined.
- Mix dry ingredients in another bowl.
- Combine wet and dry ingredients until a dough forms.
- Cut out ghost shapes using a cookie cutter.
- Prepare a baking sheet with parchment paper and place cookies.
- Bake for 10-12 minutes or until edges are lightly golden.
- Cool cookies on a wire rack before decorating.
Notes
Use room temperature butter for easier mixing. Don’t overbake, and feel free to experiment with decorations.