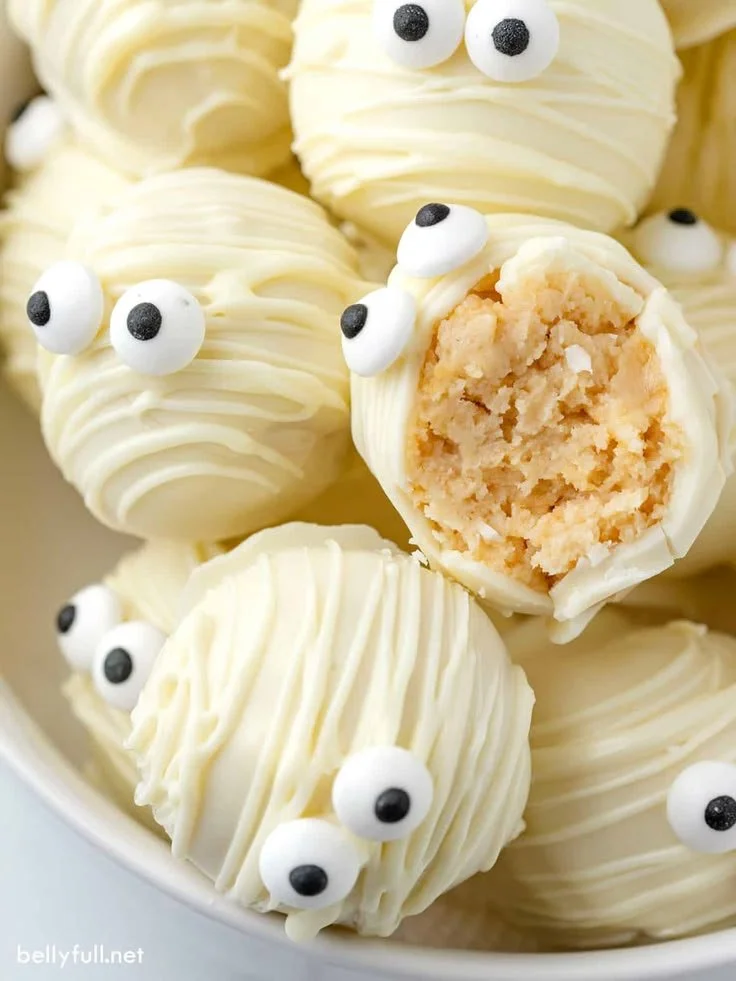
Halloween Oreo Mummy Balls are a delightful treat that perfectly captures the spirit of the spooky season. This easy recipe requires minimal ingredients and is sure to be a hit at any Halloween gathering. With their playful appearance and delicious flavor, these chocolate-dipped Oreo balls are not only fun to make, but they also bring a festive touch to your holiday celebrations.
Why You’ll Love Halloween Oreo Mummy Balls
- Simple and Quick: With just a few easy steps, you can whip up these treats in no time, making them perfect for last-minute Halloween prep.
- Fun for All Ages: This recipe is an excellent activity for families. Kids will love rolling the Oreo mixture into balls and decorating them like mummies.
- No Baking Required: Avoid the oven and still enjoy a delicious, homemade treat. This recipe is perfect for warm days or those without access to baking facilities.
- Customizable: You can easily tailor the flavors or decorations to suit your preferences or dietary needs, making this recipe versatile.
- Eye-Catching Presentation: The spooky candy eyes and chocolate drizzle add a fun visual element that will impress your guests and make for great social media photos.
Recipe Overview
- Prep time: 20 minutes
- Cook time: 0 minutes
- Total time: 20 minutes (plus chilling time)
- Servings: 12 balls
- Difficulty level: Easy
Ingredients You’ll Need for Halloween Oreo Mummy Balls
- Oreo cookies: 1 package (regular or Double Stuf). These provide the chocolatey bottom flavor and texture.
- Cream cheese: 8 oz, softened. Cream cheese gives the mixture a smooth and creamy consistency.
- Chocolate: 1 cup (milk or dark chocolate chips, or coating chocolate). This will coat the Oreo balls and add richness.
- Candy eyes: Edible candy eyes for decoration. They give the mummy effect and make these treats fun and festive.
How to Make Halloween Oreo Mummy Balls
-
Crush the Oreos
Start by placing the Oreo cookies in a large mixing bowl. Use a food processor or a rolling pin to crush them into fine crumbs. This will be the base of your mummy balls. -
Combine with Cream Cheese
In the bowl of crushed Oreos, add the softened cream cheese. Mix well until fully combined and a dough forms. The texture should be smooth and able to hold together when rolled. -
Form the Balls
Use your hands to scoop out about one tablespoon of the Oreo mixture and roll it into a ball. Place each ball on a baking sheet lined with parchment paper. Aim for a uniform size, so they look neat and evenly cooked. -
Melt the Chocolate
In a microwave-safe bowl, melt the chocolate in increments of 30 seconds, stirring in between until smooth. Be careful not to overheat, as chocolate can burn easily. -
Dip the Balls
Once melted, dip each Oreo ball into the chocolate, ensuring it is coated evenly. Use a fork to lift each ball out of the chocolate, allowing any excess to drip back into the bowl. -
Set the Balls
Place the chocolate-coated balls back on the parchment-lined baking sheet. Let them sit for a few minutes until they are set. -
Add the Mummy Details
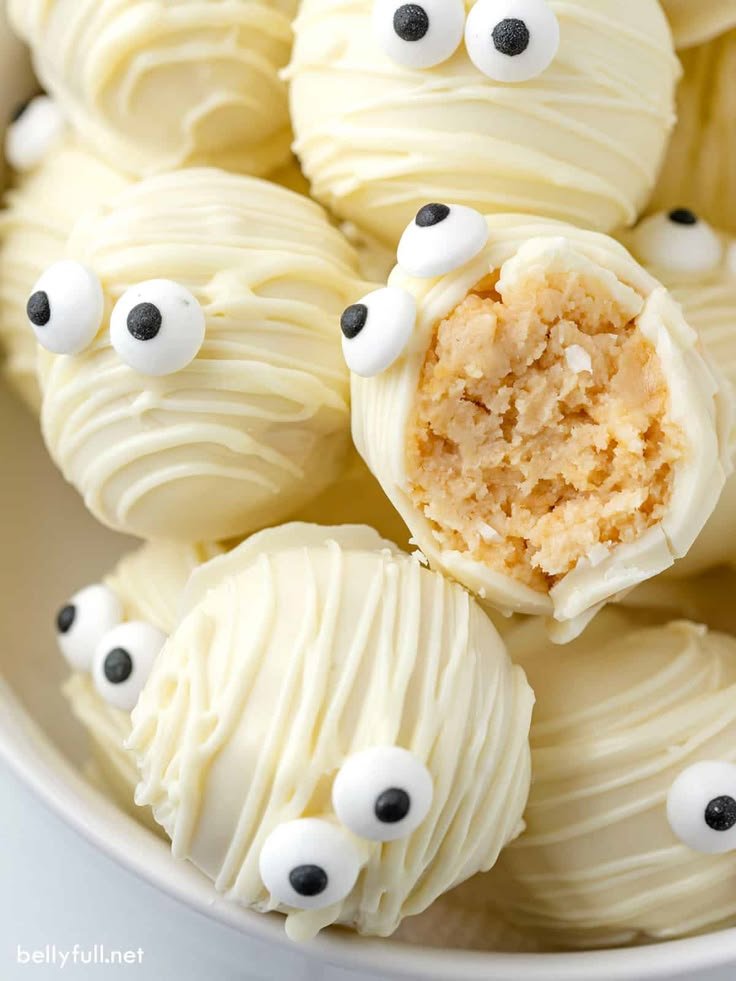
Using the remaining melted chocolate, drizzle it over the balls to create a ‘mummy’ effect. Quickly place the candy eyes on top before the chocolate hardens. -
Chill and Serve
Refrigerate the balls for about 30 minutes to firm up before serving. Enjoy your Halloween Oreo Mummy Balls at your spooky gathering!
Tips for Success
- Use Softened Cream Cheese: Ensuring your cream cheese is at room temperature makes mixing easier and yields a creamier texture.
- Avoid Overheating the Chocolate: Heat in short bursts and stir frequently to get a smooth consistency without burning.
- Uniform Ball Size: Aim for consistency in size to ensure even setting and an appealing presentation.
- Keep Them Cool: Storing them in the refrigerator helps maintain their shape and prevents melting, especially in warm conditions.
Easy Variations
- Nut Butter Twist: Substitute half of the cream cheese with peanut butter or almond butter for added flavor.
- Flavor Infusion: Add a teaspoon of peppermint extract or orange extract to the cream cheese mixture for a seasonal twist.
- Dairy-Free Option: Use dairy-free cream cheese and chocolate to make these treats suitable for lactose-free diets.
- Seasonal Sprinkles: Before the chocolate sets, add festive Halloween-themed sprinkles or crushed candy for added fun.
What to Serve with Halloween Oreo Mummy Balls
- Pumpkin Spice Cupcakes: These add a seasonal touch and pair well with the rich flavor of the Oreo balls.
- Spooky Cheese Platter: Include Halloween-themed cheeses and crackers for a savory contrast to the sweet treats.
- Witch’s Brew Punch: A fun, themed drink that complements the festive mood.
- Caramel Apples: These classic treats provide a crunchy texture to balance the softness of the Oreo balls.
Storage and Reheating
- Refrigerator Storage: Store leftover mummy balls in an airtight container in the fridge for up to a week.
- Freezer Storage: For longer storage, place them in a freezer-safe container. They can last for up to three months. Thaw them in the fridge before serving.
- Best Reheating Method: Enjoy these treats cold; they do not need reheating. However, if you prefer them warm, microwave each ball for about 10 seconds.
Common Mistakes to Avoid
- Not Crushing Oreos Enough: Ensure the Oreos are finely crushed to achieve a smooth mixture; larger chunks will make it harder to form balls.
- Making Balls Too Large: Larger balls can take longer to set and may be difficult to dip in chocolate.
- Not Allowing Setting Time: Don’t skip the chilling step; it helps the chocolate harden and keeps the balls from falling apart.
Halloween Oreo Mummy Balls: Background & Cultural Inspiration
Halloween Oreo Mummy Balls blend the popular flavors of Oreos and chocolate, making them a beloved treat during the fall festivities. The tradition of mummies during Halloween often evokes thoughts of spooky tales and haunted houses, offering a fun, lighthearted way to celebrate the season. With roots in ancient customs of honoring the dead, Halloween has evolved into a time for costumes, trick-or-treating, and festive food creations like these Oreo balls, ensuring that everyone can join in the fun and festivities.
Frequently Asked Questions
Can I use other cookies instead of Oreos?
Yes, you can use any chocolate sandwich cookies or even vanilla cookies for a different flavor profile.
How do I transport these Oreo Mummy Balls?
Place the mummy balls in a single layer inside a container for transport to maintain their shape. Consider using parchment paper for extra protection.
Can I make these ahead of time?
Absolutely! You can prepare these a few days in advance and store them in the fridge until you are ready to serve.
What can I do if the chocolate is too thick for dipping?
If your melted chocolate is thick, add a teaspoon of vegetable oil or shortening to help thin it out for more manageable dipping.
How long do these keep?
Stored in the refrigerator, they can last about a week, while frozen, they can maintain quality for up to three months.
Final Thoughts
Try making Halloween Oreo Mummy Balls for your next gathering. They offer a delightful combination of flavors and a playful appearance that captures the essence of Halloween. Whether for a party or a fun family activity, these treats are sure to bring smiles and joy. Enjoy getting creative with this easy recipe, and don’t forget to share them with friends and family!
PrintHalloween Oreo Mummy Balls

Delightful chocolate-dipped Oreo balls that resemble mummies, perfect for Halloween gatherings.
- Prep Time: 20 minutes
- Cook Time: 0 minutes
- Total Time: 20 minutes
- Yield: 12 balls
- Category: Dessert
- Method: No-Bake
- Cuisine: American
- Diet: Vegetarian
Ingredients
- 1 package Oreo cookies (regular or Double Stuf)
- 8 oz cream cheese, softened
- 1 cup chocolate chips (milk or dark)
- Edible candy eyes
Instructions
- Crush the Oreos into fine crumbs in a large mixing bowl.
- Combine the crushed Oreos with softened cream cheese until smooth.
- Form approximately 1 tablespoon of the mixture into balls and place on a baking sheet.
- Melt the chocolate in a microwave-safe bowl until smooth.
- Dip each ball into the melted chocolate, coating them evenly.
- Set the chocolate-coated balls on parchment paper and allow to cool.
- Add melted chocolate drizzles and place candy eyes before chocolate hardens.
- Chill in the refrigerator for about 30 minutes before serving.
Notes
Use softened cream cheese for easier mixing and aim for uniform ball sizes for better presentation.