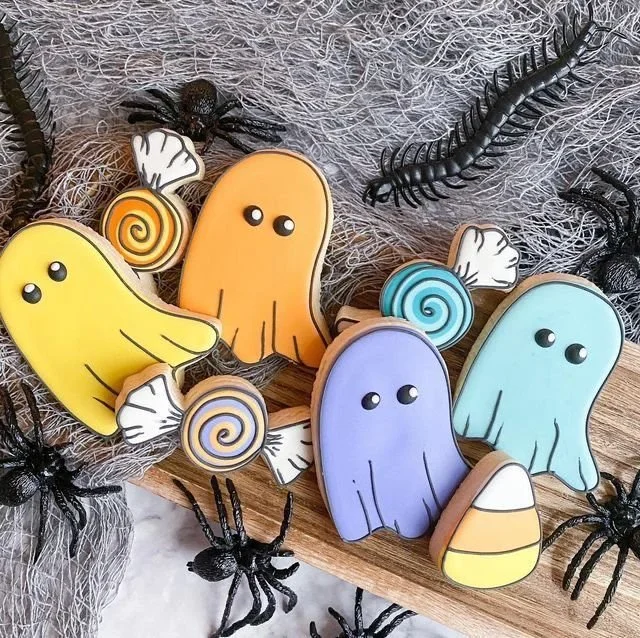
Creating your own Halloween Ghost Cookies is a delightful way to combine festive fun with baking. These charming treats not only taste great but also add a playful touch to your Halloween celebrations. Whether you’re hosting a spooky party or simply looking to bring some holiday cheer, these cookies are sure to impress.
Why You’ll Love Halloween Ghost Cookies
- Easy to Make: With straightforward ingredients and simple steps, these cookies are perfect for beginner bakers.
- Fun Decor: Decorating these cookies allows for creativity—perfect for kids and adults to get involved!
- Perfect for Parties: Their spooky yet cute design makes them an ideal treat for Halloween gatherings.
- Versatile Flavor: Use a classic sugar cookie base that complements a variety of toppings and decorations.
- Great for Gifting: Package these cookies in festive boxes for a sweet homemade gift this Halloween!
Recipe Overview
- Prep Time: 20 minutes
- Cook Time: 10 minutes
- Total Time: 30 minutes
- Servings: About 24 cookies
- Difficulty Level: Easy
Ingredients You’ll Need for Halloween Ghost Cookies
For the Cookies:
-
2 ¾ cups all-purpose flour
- This gives the cookies structure.
-
1 teaspoon baking powder
- Helps the cookies rise and become fluffy.
-
½ teaspoon salt
- Enhances the overall flavor.
-
1 cup unsalted butter, softened
- Adds richness and a tender texture.
-
1 ½ cups granulated sugar
- Sweetens the dough and contributes to the cookie’s crisp edges.
-
1 egg
- Binds the ingredients together.
-
1 teaspoon vanilla extract
- Infuses a pleasant aroma and flavor.
For the Royal Icing:
-
3 egg whites
- Forms the base of the icing.
-
4 cups powdered sugar
- Sweetens and thickens the icing, allowing it to hold its shape.
-
1 teaspoon lemon juice
- Adds a bit of tartness and helps stabilize the icing.
-
Black edible food markers or chocolate chips for decorating
- For the ghostly faces!
How to Make Halloween Ghost Cookies
Step 1: Prepare the Dough
In a large bowl, whisk together the flour, baking powder, and salt until well combined. In another bowl, cream the softened butter and granulated sugar until light and fluffy—about 3-5 minutes. Beat in the egg and vanilla extract, mixing until combined.
Step 2: Combine Wet and Dry
Gradually add the flour mixture into the wet ingredients, mixing until just incorporated. Avoid over-mixing to ensure tender cookies.
Step 3: Chill the Dough
Cover the cookie dough with plastic wrap and refrigerate for at least 1 hour. Chilling the dough makes it easier to roll out and helps the cookies maintain their shape while baking.
Step 4: Preheat the Oven
When you’re ready to bake, preheat your oven to 350°F (175°C). Line baking sheets with parchment paper.
Step 5: Roll and Cut
Roll out the chilled dough on a lightly floured surface to about ¼ inch thick. Use a ghost-shaped cookie cutter to cut out shapes and place them on the prepared baking sheets.
Step 6: Bake the Cookies
Bake in the preheated oven for 8-10 minutes, or until the edges are lightly golden and the cookies are set. Keep an eye on them to avoid over-baking!
Step 7: Cool Completely
Allow the cookies to cool on the baking sheets for a few minutes, then transfer them to wire racks to cool completely before decorating.
Step 8: Make the Royal Icing
Using an electric mixer, beat the egg whites until frothy. Gradually add the powdered sugar, mixing until the icing holds stiff peaks. Stir in the lemon juice. Divide the icing into bowls and color with food coloring if desired.
Step 9: Decorate Your Ghosts
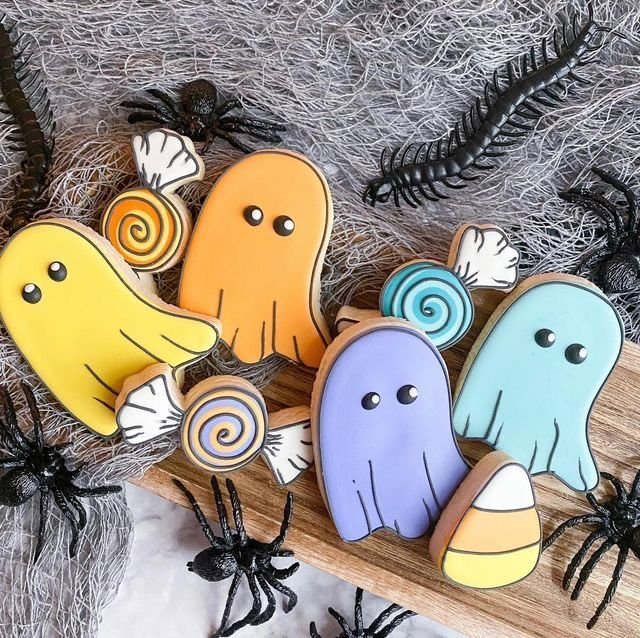
Once the cookies are cool, use a piping bag or a small spoon to decorate them with the royal icing. Draw ghostly faces using black edible markers or chocolate chips.
Tips for Success
- Flour Measurement: Spoon flour into your measuring cup and level it off for accuracy—too much flour can lead to dry cookies.
- Chill the Dough: Don’t skip the chilling step; it helps prevent spreading while baking.
- Monitor Baking: Every oven is different; start checking your cookies around the 8-minute mark to ensure they do not over-bake.
- Icing Consistency: For flooding icing, add a bit more water to your royal icing until it has a smoother consistency.
Easy Variations
- Chocolate Chip Ghosts: Mix in mini chocolate chips into the cookie dough for a sweet twist.
- Spooky Sprinkles: Add Halloween-themed sprinkles to the icing before it sets for extra fun.
- Vegan Option: Use a flax egg and vegan butter for a plant-based alternative without sacrificing flavor.
What to Serve with Halloween Ghost Cookies
- Milk: A classic pairing that balances the sweetness of the cookies.
- Hot Cider: The warmth of spiced cider complements the sugar cookies perfectly.
- Pumpkin Pie: Enjoy a slice alongside your cookies for a full Halloween dessert table.
- Ice Cream: Vanilla or pumpkin-flavored ice cream is a delicious addition to your treats.
Storage and Reheating
- Refrigerator Storage: Store decorated cookies in an airtight container at room temperature for up to a week.
- Freezer Storage: Unfrosted cookies can be frozen for up to 3 months. Thaw at room temperature before decorating.
- Best Reheating Method: If you prefer warm cookies, microwave a single cookie for about 10 seconds for a freshly-baked feel.
Common Mistakes to Avoid
- Overmixing the Dough: This can lead to tough cookies; mix just until combined.
- Not Chilling the Dough: Skipping this step can result in flat cookies.
- Skipping Cooling Time: Decorating warm cookies can melt the icing.
Halloween Ghost Cookies: Background & Cultural Inspiration
Halloween Ghost Cookies draw on the tradition of celebrating Halloween with sweet treats. Ghost motifs signify the playful and spooky aspects of this holiday, making these cookies a favorite among children and adults alike. The sugar cookie base is a nod to the timeless pastries that have been transformed throughout the decades with new flavors and decorations. Their white icing symbolizes the classic ghost appearance while allowing for personalized and creative expression through faces and designs.
Frequently Asked Questions
How can I make the icing thicker or thinner?
If your icing is too thick, add a tiny bit of water. If it’s too thin, add a bit more powdered sugar.
Can I make these cookies ahead of time?
Yes, you can bake the cookies ahead of time and freeze them unfrosted. Decorate them when you’re ready to serve.
What can I use instead of egg whites in royal icing?
You can use meringue powder as a substitute. Follow the package instructions for proportions.
How should I store these cookies?
Keep the cookies in an airtight container at room temperature for best freshness.
Can I use other shapes instead of ghosts?
Absolutely! Feel free to use any Halloween-themed cookie cutters like pumpkins or bats.
Final Thoughts
Making Halloween Ghost Cookies is a wonderful way to celebrate the spooky season with family and friends. Their fun design, combined with the delicious flavor of a classic sugar cookie, makes them a hit at any gathering. Try your hand at baking these delightful cookies, and unleash your creativity in decorating them! They are not just a treat but a joyful experience that brings the Halloween spirit right into your kitchen. Enjoy the process and have fun!
PrintHalloween Ghost Cookies

Delightful and spooky cookies perfect for Halloween celebrations, featuring a classic sugar cookie base and whimsical ghost decorations.
- Prep Time: 20 minutes
- Cook Time: 10 minutes
- Total Time: 30 minutes
- Yield: 24 cookies
- Category: Dessert
- Method: Baking
- Cuisine: American
- Diet: Vegetarian
Ingredients
- 2 ¾ cups all-purpose flour
- 1 teaspoon baking powder
- ½ teaspoon salt
- 1 cup unsalted butter, softened
- 1 ½ cups granulated sugar
- 1 egg
- 1 teaspoon vanilla extract
- 3 egg whites (for royal icing)
- 4 cups powdered sugar (for royal icing)
- 1 teaspoon lemon juice (for royal icing)
- Black edible food markers or chocolate chips for decorating
Instructions
- Prepare the Dough: In a large bowl, whisk together the flour, baking powder, and salt until well combined. In another bowl, cream the softened butter and granulated sugar until light and fluffy—about 3-5 minutes. Beat in the egg and vanilla extract, mixing until combined.
- Combine Wet and Dry: Gradually add the flour mixture into the wet ingredients, mixing until just incorporated. Avoid over-mixing to ensure tender cookies.
- Chill the Dough: Cover the cookie dough with plastic wrap and refrigerate for at least 1 hour.
- Preheat the Oven: When you’re ready to bake, preheat your oven to 350°F (175°C). Line baking sheets with parchment paper.
- Roll and Cut: Roll out the chilled dough on a lightly floured surface to about ¼ inch thick. Use a ghost-shaped cookie cutter to cut out shapes and place them on the prepared baking sheets.
- Bake the Cookies: Bake in the preheated oven for 8-10 minutes, or until the edges are lightly golden and the cookies are set.
- Cool Completely: Allow the cookies to cool on the baking sheets for a few minutes, then transfer them to wire racks to cool before decorating.
- Make the Royal Icing: Using an electric mixer, beat the egg whites until frothy. Gradually add the powdered sugar, mixing until the icing holds stiff peaks. Stir in the lemon juice.
- Decorate Your Ghosts: Once the cookies are cool, use a piping bag or a small spoon to decorate them with royal icing and draw ghostly faces using black edible markers or chocolate chips.
Notes
For best results, ensure to chill the dough and monitor baking time to prevent over-baking.