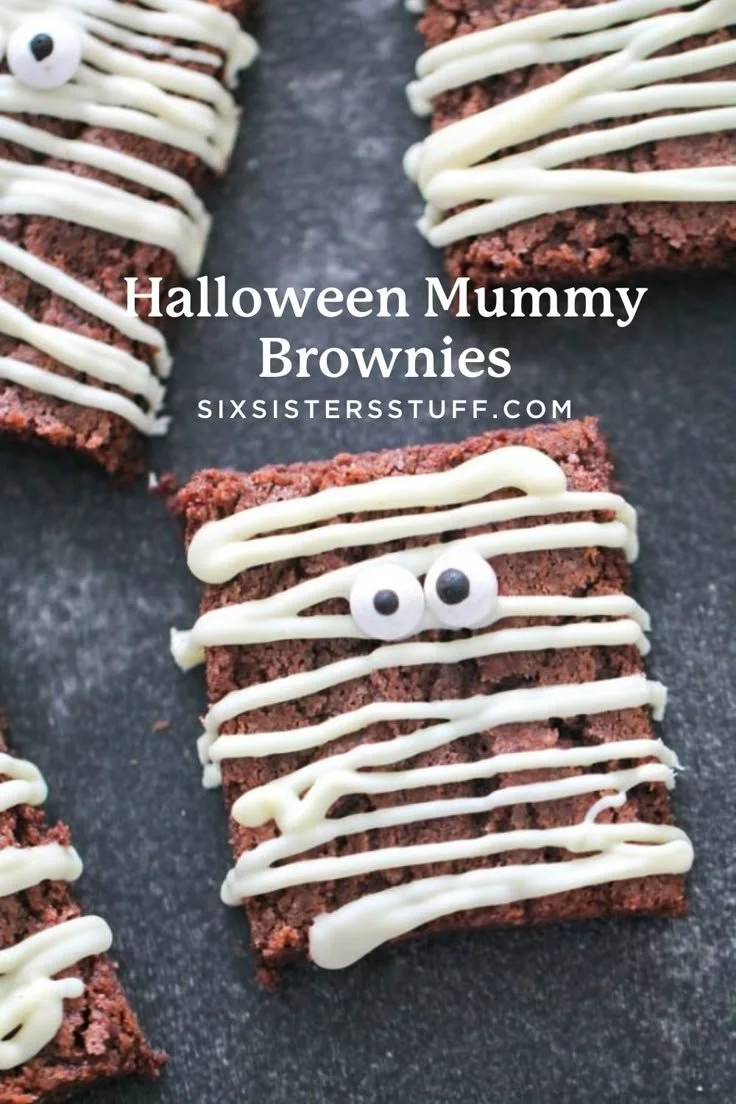
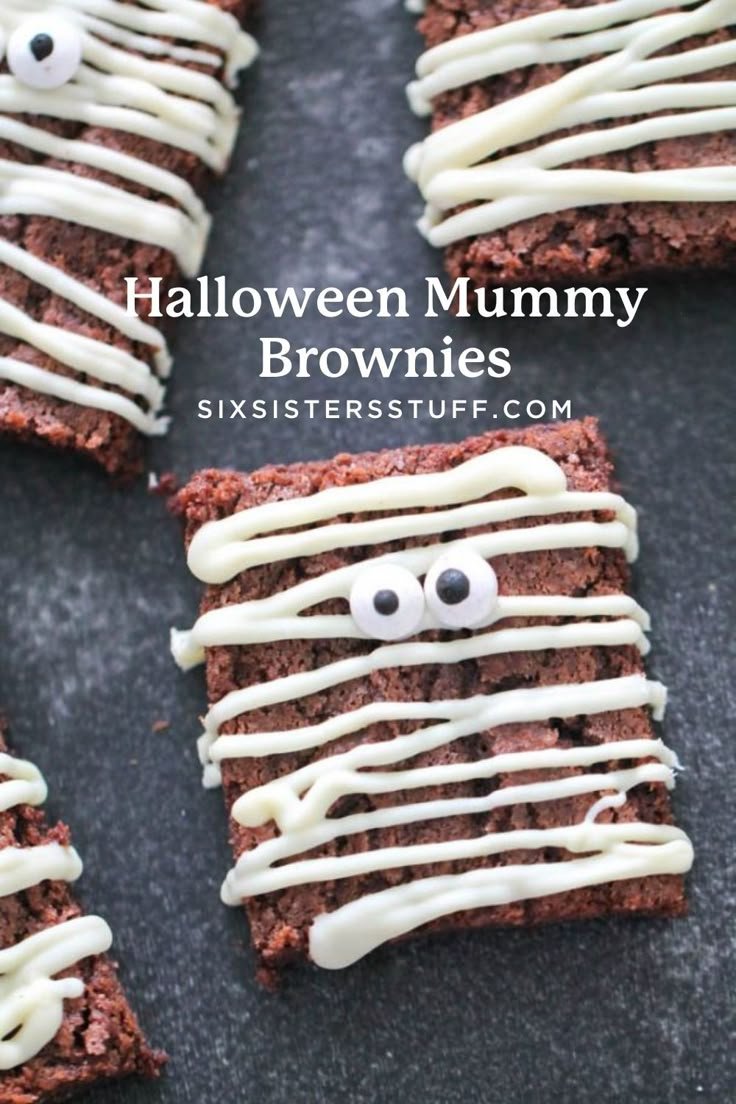
Halloween Mummy Brownies are a delightful treat that perfectly combines rich chocolate flavor with fun, festive decorations. These brownies are not only easy to make but also a hit at Halloween parties, ensuring smiles from both kids and adults alike. Top them off with white chocolate "bandages" and candy eyeballs, and you’ve got a dessert that is both delicious and visually appealing.
Why You’ll Love Halloween Mummy Brownies
- Fun and Festive: The Halloween theme is perfect for parties, school events, and family gatherings, making these brownies a playful addition to your holiday treats.
- Easy to Make: With straightforward steps, even beginner bakers can whip up these brownies without hassle.
- Rich Chocolate Flavor: The combination of cocoa and melted chocolate creates a decadent dessert that will satisfy any sweet tooth.
- Customizable Decorations: You can easily adapt the design for different occasions by changing the colors of the chocolate or the type of candy used.
- Great for Sharing: This recipe makes a generous batch, perfect for sharing with friends, family, or neighbors during the spooky season.
Recipe Overview
- Prep Time: 15 minutes
- Cook Time: 25-30 minutes
- Total Time: 45 minutes
- Servings: 24 brownies
- Difficulty Level: Easy
Ingredients You’ll Need for Halloween Mummy Brownies
-
Brownie Base:
- 1 ½ cups butter (melted)
- ¾ cup cocoa powder
- 3 cups sugar
- 6 eggs (beaten)
- 1 ½ teaspoons vanilla extract
- ¾ teaspoon salt
- 2 ¼ cups flour
-
Decoration:
- 2 cups white chocolate chips (melted)
- 48 candy eyeballs
Note: You can substitute the white chocolate chips with dark chocolate or any other favorite flavor for a different taste sensation.
How to Make Halloween Mummy Brownies
-
Preheat the Oven
Preheat your oven to 350°F (175°C) to ensure your brownies bake evenly. -
Mix Wet Ingredients
In a large bowl, whisk together the melted butter and cocoa powder until well combined. -
Add Sugar and Eggs
Stir in the sugar, beaten eggs, vanilla extract, and salt. Mix until the mixture is smooth. -
Incorporate Flour
Gradually add the flour to the wet mixture, stirring by hand. Avoid overmixing to keep the brownies fudgy. -
Bake the Brownies
Pour the brownie batter into a greased 12 x 17-inch cookie sheet. Spread it evenly and bake for 25-30 minutes. A toothpick should come out with a few moist crumbs. -
Cool and Cut
Let the brownies cool completely. Once cooled, cut them into squares or rectangles. -
Prepare White Chocolate
Place the white chocolate chips in a microwave-safe bowl. Microwave for 2 minutes, stirring until melted and smooth. -
Decorate the Brownies
Transfer the melted white chocolate to a piping bag or a sealed plastic bag with a corner cut off. Pipe the melted chocolate back and forth across each brownie to create "bandages." -
Add Candy Eyeballs
Quickly press two candy eyeballs into the chocolate on each brownie before it sets. Let cool until the chocolate hardens, then serve.
Tips for Success
- Don’t Overbake: The brownies should be slightly soft in the center when finished. They will continue to cook as they cool.
- Let Melted Chocolate Sit: Allow the melted white chocolate to cool briefly before piping to prevent it from being too runny.
- Use a Sharp Knife: For cleaner cuts, make sure to use a sharp knife to cut the brownies after they’ve cooled completely.
- Experiment with Add-Ins: Feel free to add nuts or chocolate chips to the brownie batter for added texture.
Easy Variations
- Spiced Brownies: Add cinnamon or nutmeg to the batter for a warm, spiced flavor that complements the chocolate.
- Fudgy Brownies: Substitute half the flour with more cocoa powder to create an even richer brownie.
- Vegan Option: Use a vegan butter substitute and flax eggs instead of regular eggs to make a plant-based version of these brownies.
- Seasonal Colors: Use colored chocolate melts to create bands that match your party theme outside of Halloween.
What to Serve with Halloween Mummy Brownies
- Pumpkin Spice Latte: The warm flavors of pumpkin spice complement the chocolate nicely, making for a comforting drink pairing.
- Vanilla Ice Cream: A scoop of vanilla ice cream on the side can balance the richness of the brownies beautifully.
- Caramel Sauce: Drizzling warm caramel over the brownies adds an indulgent touch.
- Apple Cider: A chilled glass of apple cider enhances the fall theme and provides a refreshing contrast.
Storage and Reheating
- Refrigerator Storage: Store brownies in an airtight container in the fridge for up to one week.
- Freezer Storage: If you want to freeze them, wrap the cooled brownies tightly in plastic wrap and place them in a freezer bag. They can be stored for up to 3 months.
- Reheating Method: For best results, reheat brownies in the microwave for 10-15 seconds or in an oven at 300°F until warmed through.
- Maintaining Texture: To keep brownies moist, avoid prolonged exposure to air by tightly sealing them.
Common Mistakes to Avoid
- Overmixing the Batter: This can lead to dense, tough brownies; mix just until combined.
- Underbaking: Pulling the brownies out too soon can result in a gooey texture that’s not ideal for cutting.
- Ignoring Cooling Time: Cooling the brownies completely before cutting ensures cleaner slices and better presentation.
Halloween Mummy Brownies: Background & Cultural Inspiration
Halloween Mummy Brownies draw inspiration from the spooky, creative spirit of Halloween, where monstrous themes are transformed into playful dishes. Halloween itself has origins in ancient Celtic festivals, notably Samhain, which marked the end of harvest and the beginning of winter. Over time, it evolved into a celebration of costumes, treats, and community gatherings. These brownies embody the light-hearted side of Halloween festivities, making baking a fun and engaging family activity.
Frequently Asked Questions
Can I make these brownies ahead of time?
Yes, these brownies can be made ahead of time. They store well in the refrigerator for several days or can be frozen for longer storage.
What can I substitute for white chocolate?
You can use dark chocolate or milk chocolate chips if you prefer those flavors. Just make sure to adjust the sweetness accordingly.
How do I know when the brownies are done?
Insert a toothpick into the center of the brownies; if it comes out with a few moist crumbs, they are done. If it comes out with wet batter, they need more time.
Can I add nuts to the brownie batter?
Absolutely! Adding nuts like walnuts or pecans can enhance the texture and provide a delicious crunch.
Are there any gluten-free options?
Yes, you can substitute all-purpose flour with a 1:1 gluten-free baking blend. Just be sure the blend does not contain any additional leavening agents.
Final Thoughts
Making Halloween Mummy Brownies is a fun and creative way to celebrate the spooky season. With their rich chocolate flavor and playful appearance, these treats are sure to delight everyone who tries them. Don’t hesitate to gather your ingredients and get started—these brownies are an enjoyable baking project that will bring joy to your autumn festivities. Happy Halloween baking!
PrintHalloween Mummy Brownies
Delightful Halloween brownies decorated with white chocolate ‘bandages’ and candy eyeballs, perfect for parties.
- Prep Time: 15 minutes
- Cook Time: 30 minutes
- Total Time: 45 minutes
- Yield: 24 brownies
- Category: Dessert
- Method: Baking
- Cuisine: American
- Diet: Vegetarian
Ingredients
- 1 ½ cups butter (melted)
- ¾ cup cocoa powder
- 3 cups sugar
- 6 eggs (beaten)
- 1 ½ teaspoons vanilla extract
- ¾ teaspoon salt
- 2 ¼ cups flour
- 2 cups white chocolate chips (melted)
- 48 candy eyeballs
Instructions
- Preheat your oven to 350°F (175°C) to ensure your brownies bake evenly.
- Mix together the melted butter and cocoa powder until well combined.
- Stir in the sugar, beaten eggs, vanilla extract, and salt until smooth.
- Gradually add the flour, stirring by hand. Avoid overmixing to keep the brownies fudgy.
- Pour the batter into a greased 12 x 17-inch cookie sheet. Spread evenly and bake for 25-30 minutes.
- Let the brownies cool completely. Cut them into squares or rectangles.
- Place white chocolate chips in a bowl. Microwave for 2 minutes, stirring until melted.
- Transfer the melted chocolate to a piping bag and pipe back and forth across each brownie.
- Quickly press two candy eyeballs into the chocolate on each brownie before it sets. Let cool until the chocolate hardens.
Notes
Don’t overbake; brownies should be soft in the center. Use a sharp knife for cleaner cuts.