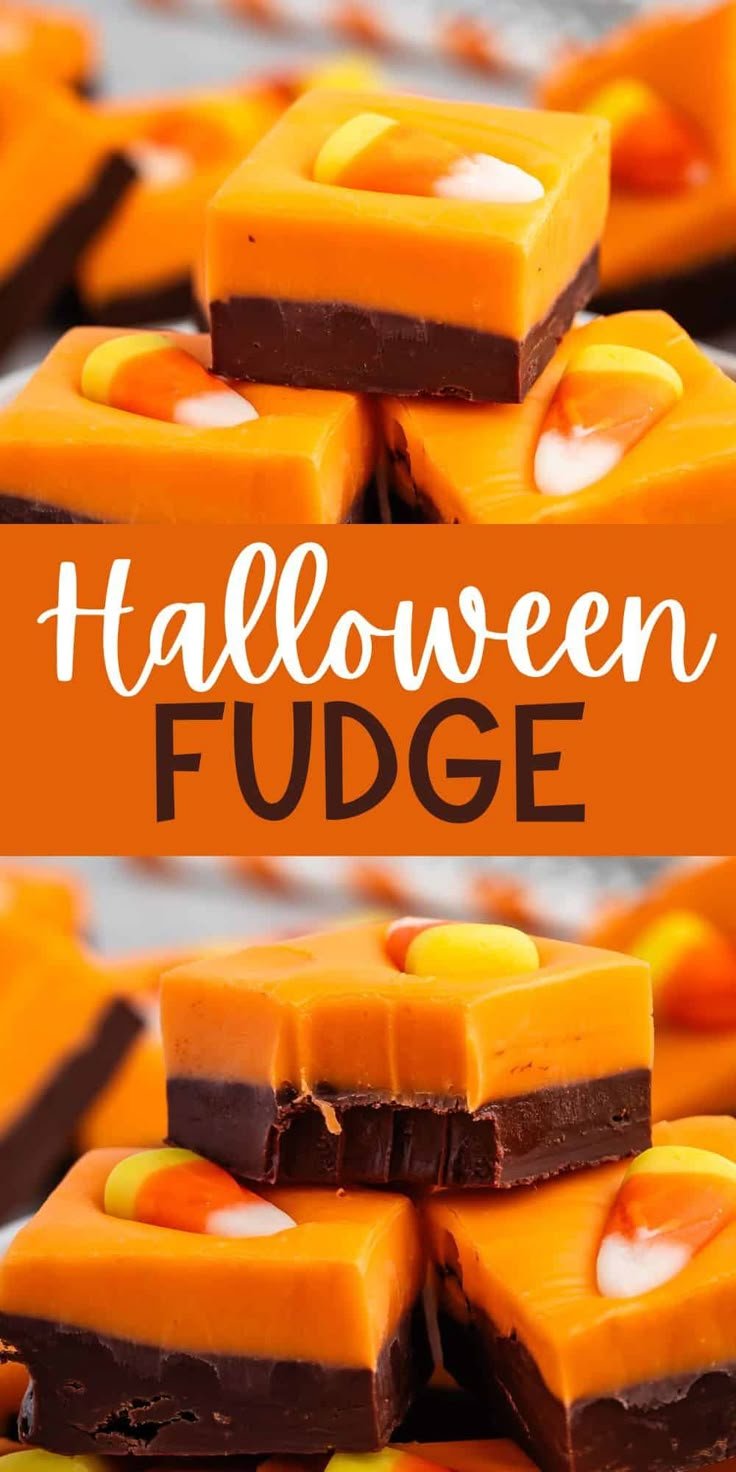
Layered Halloween Fudge is a delightful treat for the spooky season, combining rich chocolate flavors with vibrant colors. This easy-to-make dessert is perfect for Halloween parties, school treats, or cozy nights in. With its gorgeous layers and festive sprinkles, it’s not only a feast for the taste buds but also a visual treat that will impress family and friends.
Why You’ll Love Layered Halloween Fudge
- Easy to Make: This recipe uses straightforward steps, making it accessible for beginner cooks.
- Visually Stunning: The bright colors and Halloween sprinkles create an eye-catching dessert that will wow your guests.
- Customizable Flavors: You can tweak the colors and flavors to suit your preferences or dietary needs.
- Perfect for Sharing: Cut into bite-sized squares, this fudge is easy to portion and share at parties or gatherings.
- No Baking Required: This recipe skips the oven entirely, making it perfect for hot days or when you want to avoid extra heat in the kitchen.
Recipe Overview
- Prep Time: 15 minutes
- Cook Time: 15 minutes
- Total Time: 2 hours 30 minutes (includes chilling)
- Servings: Makes about 16 squares
- Difficulty Level: Easy
Ingredients You’ll Need for Layered Halloween Fudge
-
Chocolate Layer:
- 2 cups semi-sweet chocolate chips
- 1/2 can (approximately 7 ounces) sweetened condensed milk
- 1/4 cup butter
-
Colored Layer:
- 1 cup white chocolate chips
- 1/2 can (approximately 7 ounces) sweetened condensed milk
- 1/4 cup butter
- Food coloring (orange, purple, green)
-
Toppings:
- Halloween-themed sprinkles
For allergy-friendly alternatives, you can substitute the semi-sweet chocolate and white chocolate with dairy-free versions.
here
How to Make Layered Halloween Fudge
1. Prepare the Pan
Line an 8×8 inch pan with parchment paper to prevent sticking and make removal easier.
2. Make the Chocolate Layer
In a saucepan over low heat, melt together 2 cups of semi-sweet chocolate chips, 1/2 can of sweetened condensed milk, and 1/4 cup of butter. Stir continuously until the mixture is smooth and well combined.
3. Spread the Chocolate Layer
Pour the melted chocolate mixture into the prepared pan and use a spatula to spread it evenly across the bottom.
4. Prepare the Colored Layer
In another saucepan, melt 1 cup of white chocolate chips, the remaining sweetened condensed milk, and 1/4 cup of butter over low heat. Once melted, divide the mixture into separate bowls and tint each with a different food coloring: orange, purple, and green.
5. Layer the Colors
Pour each colored layer on top of the chocolate layer, spreading evenly to create distinct layers.
6. Add Sprinkles
Generously sprinkle Halloween-themed sprinkles on top of the colored layers for a festive touch.
7. Chill Until Set
Refrigerate the fudge for about 2 hours, or until it is completely set.
8. Cut and Serve
Once set, remove the fudge from the pan using the overhanging parchment paper. Cut into squares and enjoy!
Tips for Success
- Use Low Heat: Melting chocolate too quickly can cause it to seize. Always use low heat and take your time.
- Stir Constantly: When melting chocolate, keep stirring to ensure even melting and to avoid burning.
- Color Intensity: Use gel food coloring for brighter, more vibrant layers. Liquid coloring may dilute the mixture.
- Chill Thoroughly: Make sure to chill the layers for enough time to ensure they set properly and hold their shape.
- Storage: Keep any leftover fudge in an airtight container to prevent it from getting sticky.
Easy Variations
- Flavored Fudge: Add a teaspoon of peppermint or orange extract to enhance the flavor of the chocolate layers.
- Nutty Twist: Mix in crushed nuts like walnuts or pecans into the chocolate layer for added texture.
- Marshmallow Layer: Add a layer of mini marshmallows between the chocolate and colored layers for a gooey surprise.
- Dairy-Free Options: Use dairy-free chocolate and sweetened condensed milk for a completely dairy-free version.
What to Serve with Layered Halloween Fudge
- Hot Apple Cider: The warm spices in apple cider complement the rich chocolate flavors beautifully.
- Pumpkin Spice Cookies: Pairing with these cookies enhances the autumn theme, offering a variety of textures and flavors.
- Chocolate Milk: A classic pairing that satisfies the sweet tooth while balancing the richness of the fudge.
- Coffee or Espresso: The bitterness of coffee contrasts nicely with the sweetness of the fudge, making it a great dessert option.
Storage and Reheating
- Refrigerator Storage: Store the fudge in an airtight container in the refrigerator for up to two weeks.
- Freezer Storage: For longer storage, you can freeze it for up to three months. Cut into squares and layer them with parchment paper in a freezer-safe container.
- Best Reheating Method: If the fudge softens, let it thaw in the refrigerator before serving to maintain its texture. Avoid microwaving as it could melt.
Common Mistakes to Avoid
- Skipping the Parchment Paper: Not lining the pan can lead to a messy removal.
- Not Letting it Chill: Cutting the fudge before it has properly set will result in a mushy texture.
- Using High Heat: Melting chocolate too quickly can ruin the texture; always use low heat.
- Overmixing Colored Layers: Stirring too much after adding food coloring can affect the layering effect.
Layered Halloween Fudge: Background & Cultural Inspiration
Layered fudge is often associated with festive celebrations, making it a popular treat during Halloween and other holidays. The creativity involved in layering colors provides an opportunity to engage with seasonal themes and reflect individual tastes. In many cultures, making treats for holidays is a cherished tradition that brings families together, and this fudge fits easily into those traditions. The visual excitement of colorful layers invites sharing and togetherness, reinforcing the community aspect intrinsic to Halloween festivities.
Frequently Asked Questions
Can I use different colors?
Yes! Feel free to use any food coloring you like to match your desired theme or mood.
How long can I store this fudge?
Layered Halloween fudge can be stored in the refrigerator for up to two weeks or in the freezer for three months.
Is there a dairy-free option?
Absolutely! Substitute the semi-sweet chocolate and white chocolate with dairy-free versions, and use a vegan sweetened condensed milk.
Can I make this ahead of time?
Yes, this fudge can be made a few days in advance. Just ensure it’s stored properly in the fridge.
What’s the best way to cut the fudge?
For clean cuts, use a sharp knife and warm it slightly under hot water before slicing the fudge into squares.
Final Thoughts
Layered Halloween Fudge is not just a treat; it’s a festive celebration for the senses. With easy steps and colorful layers, it’s a fun project for anyone looking to participate in Halloween festivities. Whether you’re sharing it with friends or enjoying it on a quiet evening, this fudge will surely bring joy to your taste buds and create lasting memories. Give this recipe a try, and watch as it becomes a seasonal favorite year after year!
PrintLayered Halloween Fudge

A delightful layered fudge combining rich chocolate flavors with vibrant colors, perfect for Halloween festivities.
- Prep Time: 15 minutes
- Cook Time: 15 minutes
- Total Time: 150 minutes
- Yield: 16 servings
- Category: Dessert
- Method: No Bake
- Cuisine: American
- Diet: Vegetarian
Ingredients
- 2 cups semi-sweet chocolate chips
- 1/2 can (approximately 7 ounces) sweetened condensed milk
- 1/4 cup butter
- 1 cup white chocolate chips
- 1/2 can (approximately 7 ounces) sweetened condensed milk
- 1/4 cup butter
- Food coloring (orange, purple, green)
- Halloween-themed sprinkles
Instructions
- Prepare the Pan: Line an 8×8 inch pan with parchment paper to prevent sticking.
- Make the Chocolate Layer: In a saucepan over low heat, melt together chocolate chips, sweetened condensed milk, and butter until smooth.
- Spread the Chocolate Layer: Pour the melted chocolate mixture into the prepared pan, spreading it evenly.
- Prepare the Colored Layer: In another saucepan, melt white chocolate chips, remaining sweetened condensed milk, and butter over low heat. Divide and tint with food coloring.
- Layer the Colors: Pour each colored layer on top of the chocolate layer, spreading evenly.
- Add Sprinkles: Sprinkle Halloween-themed sprinkles on top of the colored layers.
- Chill Until Set: Refrigerate the fudge for about 2 hours, or until set.
- Cut and Serve: Remove fudge from the pan and cut into squares.
Notes
Use gel food coloring for more vibrant layers. Store leftovers in an airtight container.