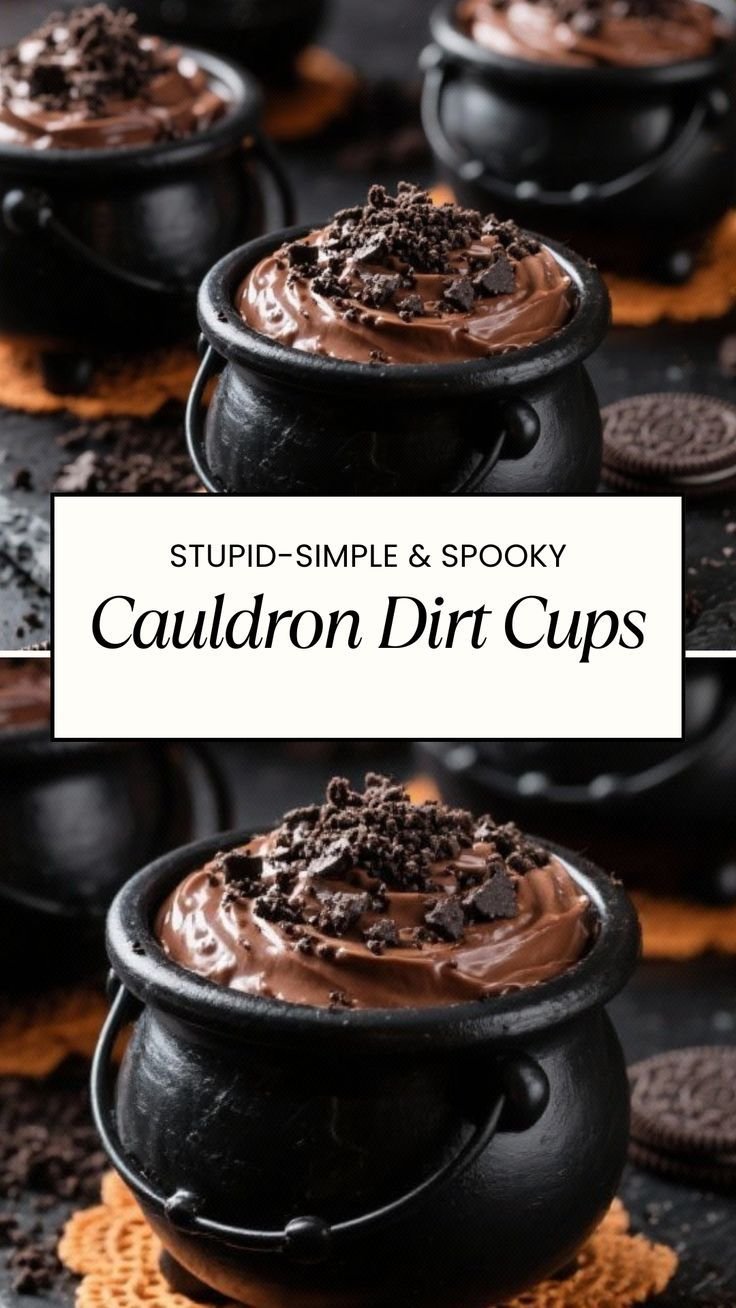
Indulge in a fun and festive treat with these Spooky Cauldron Dirt Cups! Perfect for Halloween or any spooky gathering, these delightful cups combine creamy chocolate pudding with crunchy Oreo cookies, topped with gummy worms for an irresistible treat. They’re not only simple to make but also sure to delight both kids and adults alike!
Why You’ll Love Spooky Cauldron Dirt Cups
- Easy to Make: With minimal ingredients and simple steps, even novice cooks can whip these up effortlessly.
- Fun Presentation: The combination of chocolate pudding and crushed Oreos resembles a spooky dirt cup, sure to impress your guests.
- Customizable: You can easily adapt the recipe with different toppings or mix in your favorite candies.
- No Baking Required: This recipe skips the oven, making it perfect for hot days or quick desserts.
- Great for Parties: They’re portable and can be made ahead of time, allowing you to enjoy the festivities without fussing in the kitchen.
Recipe Overview
- Prep Time: 10 minutes
- Cook Time: 0 minutes (just chilling time)
- Total Time: 30 minutes (including setting time)
- Servings: 4 cups
- Difficulty Level: Easy
Ingredients You’ll Need for Spooky Cauldron Dirt Cups
- 1 package of chocolate pudding mix
- 2 cups milk
- 1 package of crushed Oreo cookies
- Gummy worms
- Chocolate sprinkles
- Plastic cups for serving
Notes:
- The chocolate pudding mix creates a rich and creamy base.
- Whole milk is recommended for a creamier texture, but you can substitute with almond milk for a dairy-free option.
- For crust, use store-bought crushed Oreos or crush whole Oreos in a zip-top bag.
How to Make Spooky Cauldron Dirt Cups
-
Prepare the Pudding: In a mixing bowl, combine the chocolate pudding mix with the milk. Whisk until the mixture is smooth and free of lumps. Let it set according to package instructions, usually about 5 minutes.
-
Layer the Base: Once the pudding is set, take your plastic cups and add a layer of crushed Oreo cookies at the bottom. This will provide a crunchy layer that complements the creamy pudding.
-
Add the Pudding: Spoon the prepared chocolate pudding over the cookie layer until the cups are about halfway full. Try to make it smooth and even.
-
Top It Off: Add another layer of crushed Oreo cookies on top of the chocolate pudding to give the appearance of dirt.
-
Decorate: Finally, top each cup with gummy worms and sprinkle chocolate sprinkles on top to add an extra spooky touch. This resembles worms crawling through the dirt!
-
Serve and Enjoy: Chill your dirt cups for at least 15 minutes before serving to allow the flavors to meld and the pudding to firm up slightly. Enjoy your spooky treats!
Tips for Success
- Timing Matters: Ensure you let the pudding set completely for the best texture.
- Layering: Make sure the crushed Oreo layer is firmly packed to avoid it mixing too much with the pudding.
- Chilling: Chilling the cups helps them hold their shape and improves the flavors.
- Serving Size: Feel free to adjust the quantity of each layer according to your personal preference.
- Use Quality Ingredients: Opt for a high-quality chocolate pudding mix and Oreos for the best flavor.
Easy Variations
- Chocolate Cookie Crust: Substitute the crushed Oreos with other chocolate cookies for different flavors.
- Fruit Additions: Add some chopped strawberries or raspberries for a fruity twist.
- Different Toppings: Try using other gummy candies like gummy spiders or bats for a Halloween-themed look.
- Whipped Cream Layer: Add a layer of whipped cream for a creamy texture contrast.
- Pumpkin Flavored Pudding: Substitute chocolate pudding with pumpkin spice pudding for a fall-inspired version.
What to Serve with Spooky Cauldron Dirt Cups
- Halloween Punch: A spooky drink complements the theme and keeps your guests refreshed.
- Chocolate Chip Cookies: These can provide a nice contrast to the pudding cups and appeal to cookie lovers.
- Mini Cupcakes: Fun-sized cupcakes enhance the festive atmosphere.
- Fruit Skewers: They provide a fresh balance with sweet fruit on sticks—easy to grab and eat.
- Cheese and Crackers: This savory option can help balance out the sweet treats.
Storage and Reheating
- Refrigerator Storage: Store any leftover dirt cups in airtight containers in the refrigerator for up to 3 days.
- Freezer Storage: It’s not recommended to freeze these cups as the texture of pudding may change.
- Best Enjoyed Cold: To keep the best texture, serve chilled direct from the fridge.
- Meal Prep Note: These cups can be made a day in advance for convenience.
Common Mistakes to Avoid
- Not Whisking Enough: Ensure the pudding is whisked thoroughly to avoid lumps.
- Overfilling Cups: Don’t overfill the cups; leave some space for toppings.
- Heat from Pudding: If you made pudding from a heat source, ensure it’s completely cool before layering.
- Skipping Setting Time: Allow pudding to set as directed on the package for best results.
Spooky Cauldron Dirt Cups: Background & Cultural Inspiration
The concept of “dirt cups” can be traced back to fun, childhood projects often focused on making desserts that inspire creativity. They embody a sense of playfulness associated with Halloween traditions. Often made with simple ingredients, these treats are not just delicious but also allow for creativity in presentation. The use of gummy worms and crushed Oreos adds to the adventurous spirit of Halloween festivities, making dessert an experience and not just a meal.
Frequently Asked Questions
Can I make these dirt cups ahead of time?
Yes! These can be made a day in advance and stored covered in the refrigerator.
What if I can’t find chocolate pudding mix?
You can substitute with vanilla pudding and add cocoa powder to create a chocolate flavor.
How long do these keep in the fridge?
They will generally keep for up to 3 days in the refrigerator.
Can I use a different cookie instead of Oreos?
Absolutely! Any chocolate cookie will work well for the crust layer. You could also use graham crackers for a different taste.
What can I use instead of gummy worms?
Feel free to use any gummy candies, chocolate candies, or even crushed candy bars for a twist!
Final Thoughts
Spooky Cauldron Dirt Cups are a delightful and easy-to-make treat perfect for Halloween or any occasion that calls for a touch of fun. Their creamy chocolate base, combined with crunchy cookies and topped with whimsical candy, makes them a surefire hit with guests of all ages. Give this recipe a try, and enjoy a spooktacular dessert that’s sure to be a conversation starter!
PrintSpooky Cauldron Dirt Cups

Indulge in a fun and festive treat with these Spooky Cauldron Dirt Cups! A combination of creamy chocolate pudding and crunchy Oreo cookies, topped with gummy worms for an irresistible Halloween treat.
- Prep Time: 10 minutes
- Cook Time: 0 minutes
- Total Time: 30 minutes
- Yield: 4 servings
- Category: Dessert
- Method: No Bake
- Cuisine: American
- Diet: Vegetarian
Ingredients
- 1 package of chocolate pudding mix
- 2 cups milk
- 1 package of crushed Oreo cookies
- Gummy worms
- Chocolate sprinkles
- Plastic cups for serving
Instructions
- Prepare the pudding: In a mixing bowl, combine the chocolate pudding mix with the milk. Whisk until smooth and let set according to package instructions, about 5 minutes.
- Layer the base: Add a layer of crushed Oreo cookies at the bottom of the plastic cups.
- Add the pudding: Spoon the prepared chocolate pudding over the cookie layer until cups are halfway full.
- Top it off: Add another layer of crushed Oreo cookies on top of the pudding.
- Decorate: Top each cup with gummy worms and sprinkle chocolate sprinkles on top.
- Serve and enjoy: Chill the dirt cups for at least 15 minutes before serving.
Notes
Use whole milk for a creamier texture; almond milk can be used for a dairy-free option. Ensure the Oreo layer is firmly packed.