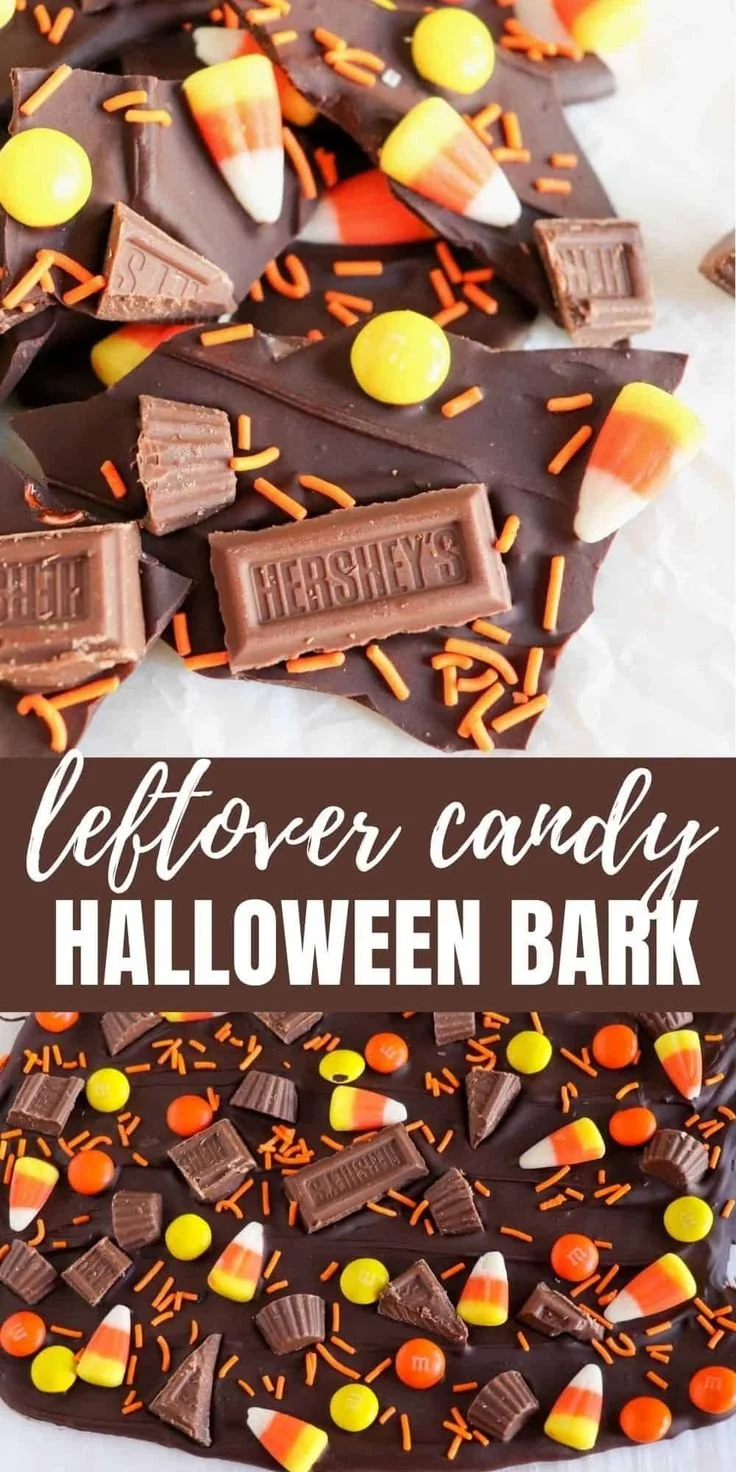
Making Leftover Candy Halloween Bark is a delightful way to repurpose your extra sweets. This simple recipe transforms chocolate and leftover candy into a festive, crunchy treat that’s perfect for sharing or indulging. With its colorful layers and irresistible flavors, you’ll want to whip this up each Halloween season.
Why You’ll Love Leftover Candy Halloween Bark
- Quick and Easy: With minimal prep and just a few steps, this recipe is perfect for beginners or anyone looking for a fast treat.
- Customizable: Use any leftover candy you have on hand, making each batch unique and suited to your taste preferences.
- Fun for Kids: This is a great activity to involve your little ones. They can help sprinkle toppings and mix candies into the chocolate.
- Perfect for Sharing: Whether it’s for a party, a school event, or just to have a sweet snack at home, this bark is easy to break into portions and share.
- Minimal Ingredients: With only a handful of ingredients needed, it’s budget-friendly and reduces food waste.
Recipe Overview
- Prep Time: 10 minutes
- Cook Time: 5 minutes
- Total Time: 1 hour 15 minutes
- Servings: About 16 pieces
- Difficulty Level: Easy
Ingredients You’ll Need for Leftover Candy Halloween Bark
- 2 cups chocolate chips (milk, dark, or white): Choose your favorite type for the base.
- 2 cups leftover Halloween candy (chopped into smaller pieces): Mix and match your favorites like Snickers, M&M’s, and Skittles.
- Sprinkles (optional): Use festive sprinkles to add color and fun.
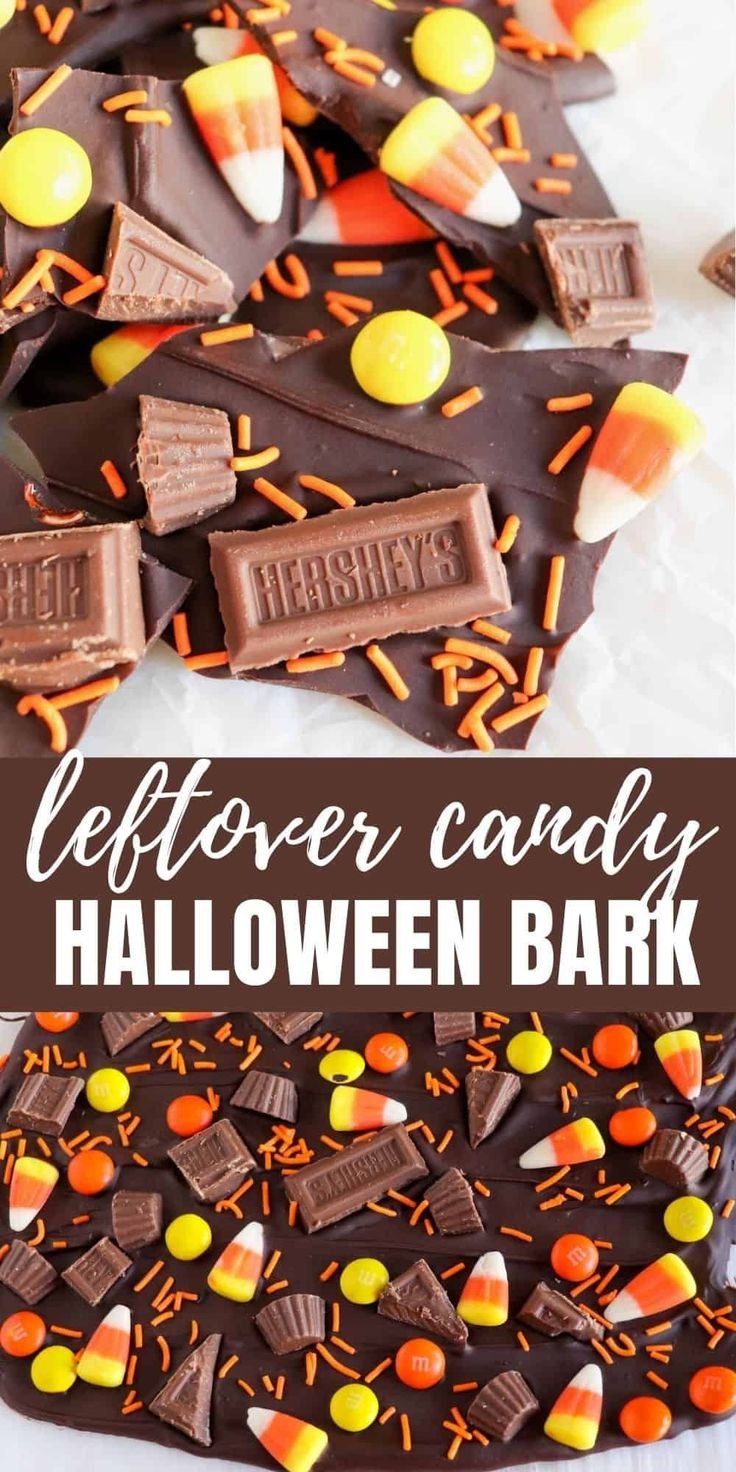
How to Make Leftover Candy Halloween Bark
-
Prepare the Baking Sheet
Line a baking sheet with parchment paper to create a non-stick surface for the bark. -
Melt the Chocolate
In a microwave-safe bowl, melt the chocolate chips in 30-second intervals, stirring after each interval until the chocolate is completely smooth. -
Spread the Chocolate
Pour the melted chocolate onto the prepared baking sheet and use a spatula to spread it evenly to your desired thickness. -
Add the Candy
Scatter the chopped leftover candy over the melted chocolate, gently pressing them down so they stick to the chocolate. -
Sprinkle for Color
If desired, add sprinkles on top to give the bark a festive look. -
Chill to Set
Place the baking sheet in the refrigerator for about 1 hour or until the chocolate has fully hardened. -
Break and Enjoy
Once set, break the bark into pieces and enjoy your delicious creation!
Tips for Success
- Even Melting: Make sure to stir the chocolate thoroughly to avoid overheating and achieve a smooth consistency.
- Chunk Size: Chop the leftover candy into small pieces for better distribution over the chocolate.
- Texture Control: For a creamier texture, try using a bit of coconut oil or shortening when melting the chocolate.
- Chilling Time: Don’t rush the chilling process; giving it enough time ensures proper setting and easier breaking.
- Layering: For added flavor, consider drizzling melted white or dark chocolate over the top of the bark before chilling.
Easy Variations
- Nutty Addition: Add chopped nuts, such as almonds or walnuts, for a crunchy texture.
- Dried Fruit: Mix in some dried cranberries or raisins for a chewy element.
- Spice It Up: Incorporate a pinch of sea salt or a sprinkle of cinnamon to enhance the flavor.
- Different Chocolate: Try using a combination of milk and white chocolate for a dual-layer effect.
- Themed Bark: Customize with holiday-themed candy for occasions beyond Halloween, like Christmas or Easter.
What to Serve with Leftover Candy Halloween Bark
- Ice Cream: A side of vanilla or chocolate ice cream complements the sweet bark perfectly.
- Hot Chocolate: Enjoy the bark with a warm cup of hot chocolate for a cozy treat.
- Coffee: Pair with coffee for a delightful afternoon snack.
- Fruit Platter: Fresh fruits like strawberries or bananas balance the sweetness of the bark.
- Cheese Board: Incorporate bark into a dessert cheese board with a mix of sweet and savory flavors.
Storage and Reheating
- Refrigerator Storage: Keep the bark in an airtight container in the refrigerator for up to two weeks.
- Freezer Storage: You can freeze the bark for longer preservation; store it in a freezer-safe container for up to two months.
- Reheating: This treat is best enjoyed right out of the fridge. Avoid reheating, as it may affect the texture and consistency.
- Meal Prep Note: This bark can be made ahead of time for parties or gatherings, making it an ideal make-ahead treat.
Common Mistakes to Avoid
- Overheating Chocolate: Ensure you melt chocolate gradually to prevent burning.
- Using Wet Equipment: Ensure all bowls and utensils are completely dry; moisture can cause chocolate to seize.
- Not Spreading Evenly: Make sure the chocolate layer is even to ensure uniform hardness.
- Ignoring Chilling Time: Allow the bark enough time to set properly for the best texture.
- Skipping Parchment Paper: Always use parchment paper to prevent sticking and make clean-up easy.
Leftover Candy Halloween Bark: Background & Cultural Inspiration
Leftover Candy Halloween Bark is a modern sweet treat that celebrates the colorful and festive spirit of Halloween. It combines the rich tradition of candymaking with innovative repurposing of sweets, allowing families to enjoy the holiday’s offerings without waste. Halloween itself is steeped in history, originating from ancient Celtic traditions that evolved over the centuries. This bark offers a fun and creative way to utilize leftover candy, embodying the playful essence of Halloween treats while encouraging resourcefulness in the kitchen.
Frequently Asked Questions
Can I use any type of candy?
Absolutely! Mix and match any candy you have leftover, from chocolate bars to gummies, based on your preferences.
How long can I store the leftover candy bark?
You can store it in an airtight container in the refrigerator for up to two weeks.
Can I make this ahead of time for a party?
Yes, it’s perfect for meal prep! You can make it a few days in advance; just ensure it’s refrigerated until serving.
What if my chocolate seizes?
If your chocolate seizes, you can try adding a small amount of vegetable oil or shortening to help smooth it out.
Can I make this dairy-free?
Yes, you can use dairy-free chocolate chips and the same process to create a delicious dairy-free version.
Final Thoughts
Making Leftover Candy Halloween Bark is a fun, creative way to use up excess Halloween candy while enjoying a delicious treat. With its easy preparation and endless customization options, this recipe is worth trying out. Whether for yourself or a gathering, you’ll be delighted by the vibrant flavors and textures that come together in this delightful bark. Enjoy making it this Halloween season and beyond!
PrintLeftover Candy Halloween Bark
A fun and simple recipe to repurpose leftover Halloween candy into a colorful and crunchy treat.
- Prep Time: 10 minutes
- Cook Time: 5 minutes
- Total Time: 75 minutes
- Yield: 16 pieces
- Category: Dessert
- Method: No-Bake
- Cuisine: American
- Diet: Vegetarian
Ingredients
- 2 cups chocolate chips (milk, dark, or white)
- 2 cups leftover Halloween candy (chopped into smaller pieces)
- Sprinkles (optional)
Instructions
- Prepare the baking sheet by lining it with parchment paper.
- Melt the chocolate chips in a microwave-safe bowl in 30-second intervals, stirring until smooth.
- Spread the melted chocolate onto the prepared baking sheet, spreading evenly.
- Add the chopped leftover candy over the melted chocolate, pressing them down gently.
- Sprinkle optional festive sprinkles on top.
- Chill in the refrigerator for about 1 hour until the chocolate hardens.
- Break into pieces and enjoy your delicious bark!
Notes
For smoother melting, avoid overheating the chocolate. Use parchment paper to prevent sticking.